Page 1 of 3
Front timing cover seal
Posted: Sun Sep 27, 2009 2:29 pm
by Huzey
Hi all.
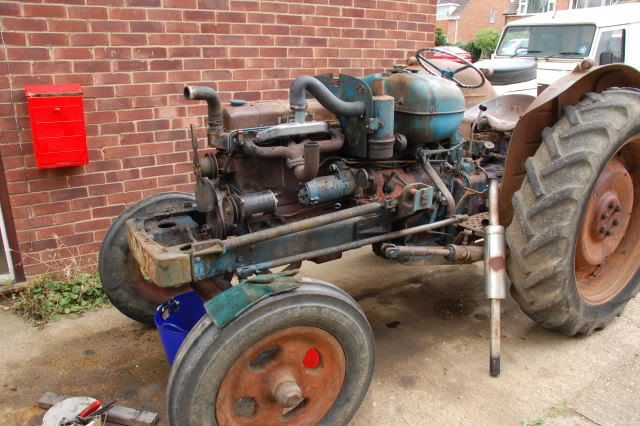
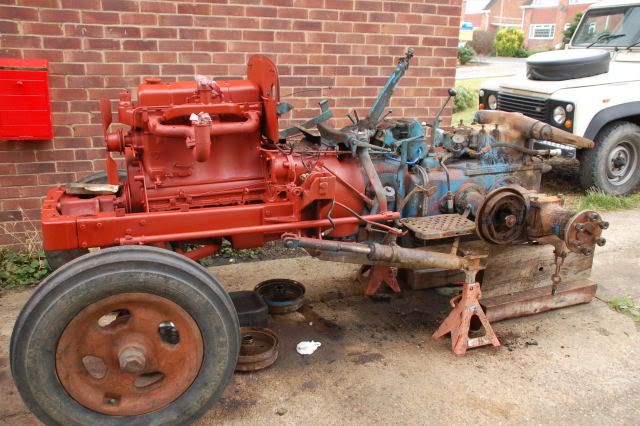
I am about to replace the timing cover seal on my major. According to the manual I have, it says you have to wheel the front end away, as in side rails, front axle, tombstone etc. Is it possible to remove the timing cover with just the nosecone and rad removed?
Thanks in advance.
Huzey

Posted: Sun Sep 27, 2009 6:31 pm
by Brian
You don't even have to remove the radiator or nose cone. I take the bottom hose off, start the big nut with a long punch and hammer, go underneath with a long soft, punch and drive the pulley off. Take all the bolts out of the timing cover and you can fiddle it out.
Posted: Sun Sep 27, 2009 6:41 pm
by henk
Hello Brian and Huzey,
I have to do the same job, but want also renew the seal behind the engine front mounting plate and if neccecery replace that, because some threath hole are bad.
Could this be done without removing the front axle and side bars?
Posted: Sun Sep 27, 2009 7:27 pm
by Brian
If you need the front plate off, I would take the radiator and front off all in one piece. Jack/block under the clutch housing. undo all the bolts on the front plate mounting to side channels, the four sideplate bolts on either side to the clutch housing and the drag link. Remove the radius rod pin from the sump, as you jack up, the radius rod will drop out and allow you to move the axle forwards. The front axle can then be used to carry everything away.
There are some pictures on the Wiki on the "Henrietta Overhaul" thread that shows how I did it. Front mounting plate gaskets were always a problem on loader tractors so it was a pretty common job. We always did it that way.
Posted: Sun Sep 27, 2009 8:24 pm
by Huzey
As always Brian, you are a legend. Many thanks.
Good luck with your's Henk.
All the best, Huzey
Posted: Sun Sep 27, 2009 8:32 pm
by henk
Brian,
This was the way I was intending it to do. Read it in the I&T book. I forgot about the wiky. The pictures are a great help.
Can I support the tractor under the sump or is it unwise?
Posted: Mon Sep 28, 2009 8:19 am
by Brian
Clutch housing is the best place Henk, just behind the flange.
Posted: Mon Sep 28, 2009 8:22 pm
by Huzey
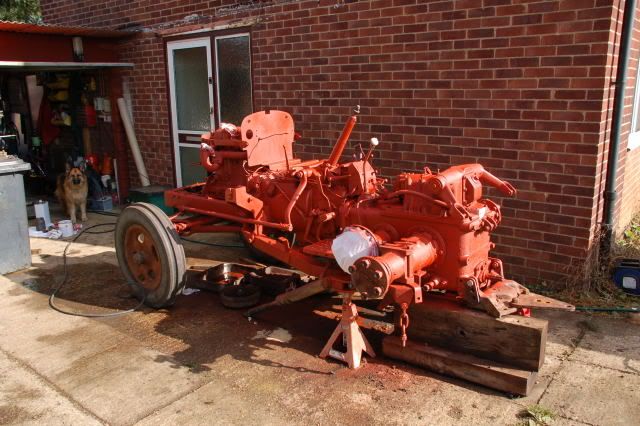
Decided to take the rad and nosecone off after all, and as per Brian's instructions, got the timing cover seal done with no problems at all.
And, threw some primer at her ready for a fresh coat of empire blue.
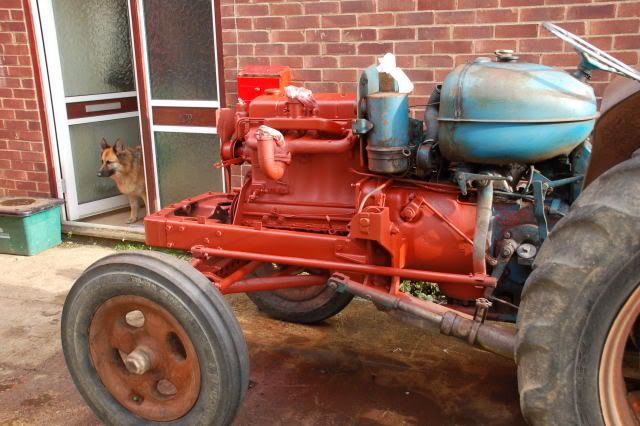
Collecting 4 tyres for her tomorrow, and then draining the back end to replace the pto selector shaft seal and the pto back end seal. Then wheels off and sort the brakes out, get the rims sorted for painting, carry on cleaning up the rest of her for priming before giving her a few coats of empire blue. Starter motor rebuild, panel beat the nosecone, new set of grills, though not orange ones, sort the lights out and the job should be a good 'un!
Really enjoying my week off so far
Huzey
Posted: Tue Sep 29, 2009 6:11 am
by Pascal
Hi Huzey,
That's a great way to fill a week off!
Great pictures. I am curious to your next pictures.
Good luck!
Posted: Tue Sep 29, 2009 9:08 am
by Bensdexta
What did you do in the way of surface prep for painting?
Looking good!
All the best,
Posted: Tue Sep 29, 2009 5:09 pm
by Huzey
Bensdexta wrote:What did you do in the way of surface prep for painting?
Looking good!
All the best,
Hi Ben.
I gave it a thorough degrease, and pressure wash off and that was about it. It is not a full blown restoration, just stop the oil leaks, and a blow over and a new set of tyres.
Talking of which;
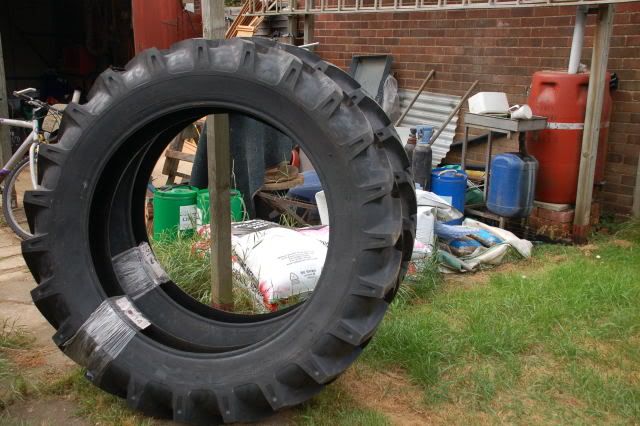
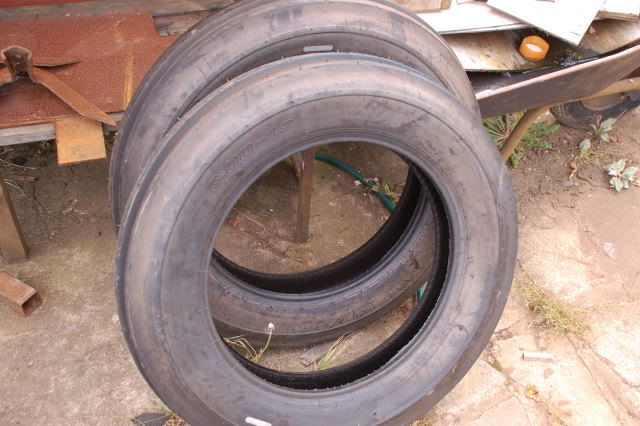
Collected these this morning, and progress on the major today was replace the pto selector shaft seal and the rear pto seal. That spring and ball detent on the selector was a bit fiddly, but apart from that, all went well.
Huzey
Posted: Wed Sep 30, 2009 4:07 pm
by Huzey
Ready for degreasing and washing off tomorrow, and then a coat of primer before getting some blue on her on friday.
Got to order some brake shoes and then hopefully, once the expanders and adjusters have been freed off, and the drums cleaned up, I will have some working brakes for the first time since owning her!!
Looking forward to getting some blue paint on the old girl!
Huzey
Posted: Wed Sep 30, 2009 7:49 pm
by Pascal
Looks great, Huzey!
Can't wait for your pictures of the next days.
Posted: Wed Sep 30, 2009 8:28 pm
by henk
You don't wase any time Huzey. This is a speedy restaration. Looks great.
Posted: Wed Sep 30, 2009 10:44 pm
by Huzey
Thanks Henk and Pascal. Of course, taking it apart is the easy bit. It's the putting it back together that always takes the time. If I can get the skid unit in blue and the wheels and tyres sorted out by Sunday, and then it will be back to work on Monday. Then it will be a case of preparing the tinwork and getting that painted next week, while we still have the good weather, hopefuly

Thanks for all the support and interest.
Huzey
Posted: Thu Oct 01, 2009 6:37 am
by Bensdexta
Huzey wrote:I gave it a thorough degrease, and pressure wash off and that was about it. It is not a full blown restoration, just stop the oil leaks, and a blow over and a new set of tyres.
Huzey,
So you paint over any rust, old paint etc with the red oxide, which should be good for a few years at least?
What paints are you using?
Impressive progress, look forward to more pics

All the best,
Posted: Thu Oct 01, 2009 7:44 am
by Huzey
So you paint over any rust, old paint etc with the red oxide, which should be good for a few years at least?
What paints are you using?
Yep, thats about it. My thinking behind it is, if it has lasted 54 years in its original paint etc, then a quick degrease and blow over should do well for another few years. I shall give the tinwork a good going over with the wire brush on the grinder followed by wet and dry paper and hope my spraying is up to leaving a good finish without the london marathon on it. (lots of runs
) I am using case new holland red oxide and I think I got the empire blue from either agriline or southern counties tractor spares.
Huzey
Posted: Thu Oct 01, 2009 12:33 pm
by Dandy Dave
Easy Off oven cleaner works well to get rid of old paint. HP wash, let it dry and repeat until satisfied results are obtained. Dandy Dave!
Posted: Thu Oct 01, 2009 1:22 pm
by Dextrous
Oven cleaner has a low concentration of caustic soda (Sodium Hydroxide) - however its a powerful chemical. I'm using a caustic soda gel that is typically used to degrease stone and brick before chemical cleaning. It was left over after I cleaned the stone on the house.
It called Neolith 425 and is much stronger than oven cleaner and being a gel it can be painted on. You have to be very cautious with it - I have a full chemical suit complete with full face/head mask. The first time I used the suit my neigbouring farmers thought that foot and mouth had broken out again!
It dissolves paint down to bare metal in no time - just need to keep it moist in really hot weather while it does its job. One application is all that's needed and after a jetwash it leaves a grease free surface ideal for repainting.
Regards
Andy
Posted: Thu Oct 01, 2009 5:09 pm
by Huzey
Well, got her degreased today. Am using something my other half sells at her company, and it is made from oranges! It is environmentaly friendly and it smells nice too, and worked quite well. It is called citraclean and it is the high strength stuff.
Got her primed quite early so I thought I would give her a coat of blue as well.
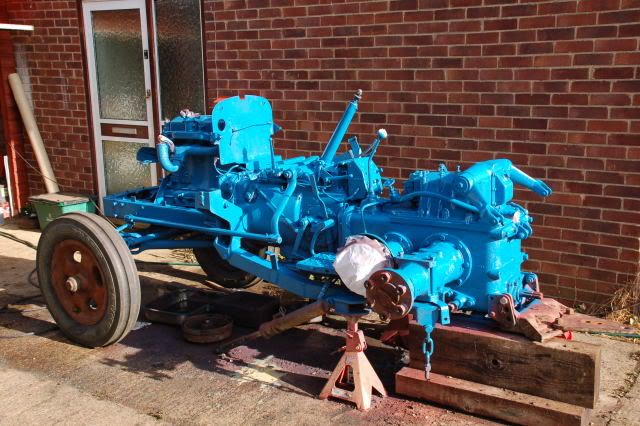
Quite pleased overall, but the more I look at it, the more I see I have missed!
Will give her another going over in the morning.
Huzey
Posted: Thu Oct 01, 2009 6:59 pm
by TOH
That is starting to look very nice! I used the same method when I painted mine. I just washed and degreased the tractor thoroughly. It was covered with thick layer of old grease mixed with dust. I had to wash it several times with a pressure washer. I used blue paint-over-rust Hammerite paint as a primer. It remains to be seen how long the paint will stay on.
Posted: Thu Oct 01, 2009 7:48 pm
by Bensdexta
Forgive my ignorance, but why does a Major appear to have 2 back axles (on the same side)??!!

Paintwork is looking good!
Posted: Thu Oct 01, 2009 8:15 pm
by Brian
The front ones are the bull pinion shafts that come out of the dif. These then drive the half shafts through large reduction gears in the transmission case. Not like a Dexta where the half shafts go straight into the dif. gears.
Bull pinion shafts have the brakes on the end. They were put on the long housings to eliminate oil leakage that the E27N suffered with, when the brakes were mounted close to the transmission case.
When seal technology improved, the brakes were remounted close to the transmission case again. The brakes were up rated to discs at the same time. This was in 1962 with the Super Major.
Posted: Thu Oct 01, 2009 8:57 pm
by Bensdexta
Brian,
Intriguing. Many thanks for the explanation!
Posted: Fri Oct 02, 2009 9:11 am
by Dextrous
Huzey wrote: hope my spraying is up to leaving a good finish without the london marathon on it. (lots of runs
) I am using case new holland red oxide and I think I got the empire blue from either agriline or southern counties tractor spares.
Huzey
Looking very good Huzey - what type of sprayer are you using? I have a normal compressed air sprayer but I'm toying with the idea of getting an airless sprayer so you get less overspray/wastage but the ones that have Xylene resistant seals tend to be a bit expensive.
Regards
Andy