Page 1 of 1
Photos of what ive been up too :)
Posted: Wed May 08, 2013 8:47 pm
by thestig246
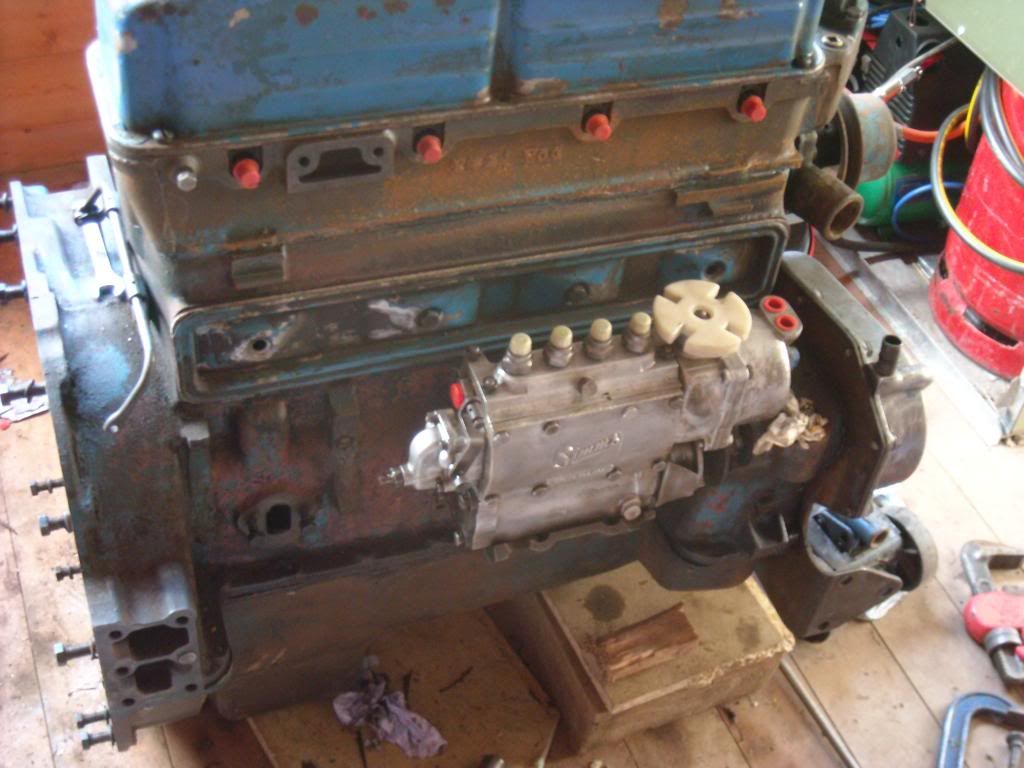
hi all been a good weekend here and managed to take some time out so could crack on with the tractor. My engine is near enough back together so i have not started on the back end. I intent on changes all the seals throughout (Seems daft not to whilst im in there). But sould i be changing all the bearings too?

I will need new bearing for the wheel shaft parts as i cut them off, but do all the gearbox bearings, and the big bearings that sit on those two big gears need doing??
Again any tips and trick to doing these gearbox seals would be grand.

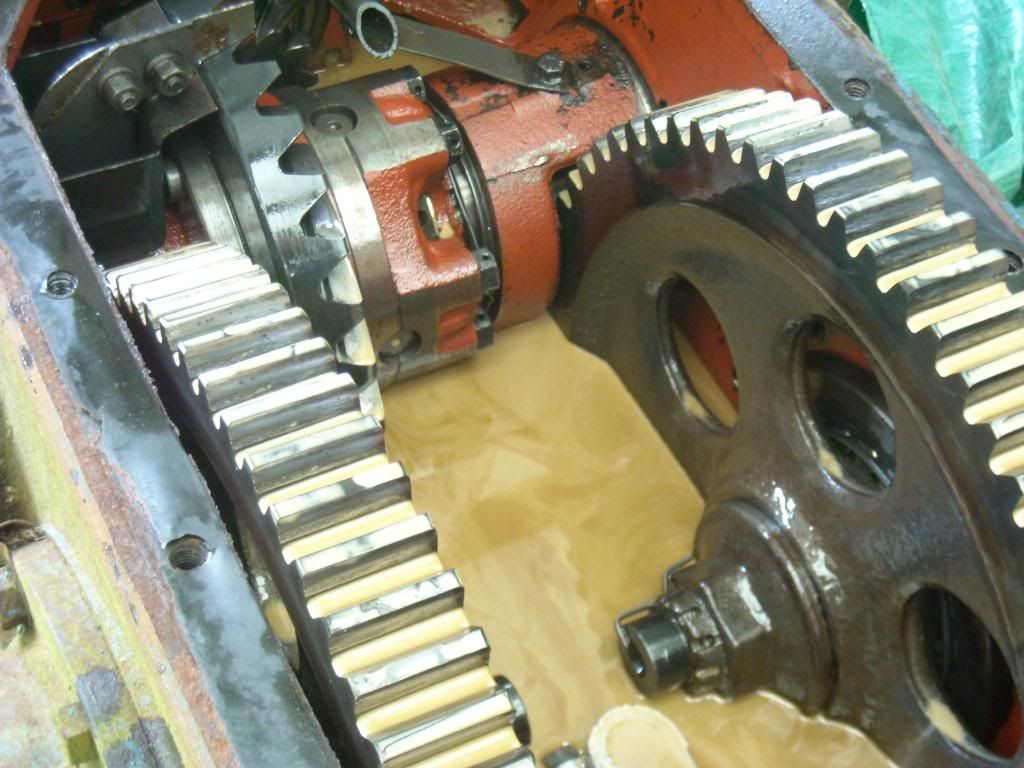
I was shocked at how much water there was in the back end, i undid the drain cap loosely and let the water dain, there must have been 50% water in there id say

proberly 50 year old oil too

Here are a few pictures of what ive been doing. Since the photos i have pulled out the drive wheel shafts and took off the bearings and seals, (with some help) Thanks
All the best Stig
Re: Photos of what ive been up too :)
Posted: Thu May 09, 2013 7:41 am
by AdrianNPMajor
Hi Dan
I've worked on three Majors - 1954, 1957 and 1963 - and none of the bearings on the large reduction gears needed replacing. To be fair neither did the bearings on the wheel end of the shaft, but I did manage to b*gger one set up when removing them. You live and learn!

While you've got the top off, I'd do the following:_
1 Remove the old oil (well beyond its sell by date! It's become an emulsion), thoroughly clean out the floor of the rear axle housing ready for the new oil.
2 Replace the rear pto extension shaft seal and the seals on the brake/clutch cross shaft (don't bother with the brake bull pinion seals - they can be done when the tractor is back together as and when necessary, though if they fail they will contaminate your brake shoes).
3 If you've got the gearbox split from the rear end, do the two seals that keep the oil from leaking into the back end.
That's about it. With a rebuilt engine bolted onto the front of this lot, your Major is good for many years of hard work.
Best
Adrian

Re: Photos of what ive been up too :)
Posted: Thu May 09, 2013 6:53 pm
by thestig246
Top advice many thanks adrain
You mention the brake seals there i was thinking of changing those as there appears to be some oil been leaking through the one, so may aswell do that aswell!! haha
how would i do about doing that as its all seems to be interconected with the diff.?? (which looks pretty complicated to a amutuer..)
Yeah you are right there it definatly needs a good clean, i think i will get some engine de-greaser and pressure wash the lot out clean. I will have a look at dropping the pto bit off the gearbox tonight and go from there
many thanks.
Re: Photos of what ive been up too :)
Posted: Thu May 09, 2013 9:09 pm
by AdrianNPMajor
Hi Dan
The bull pinion shafts slide in and out of the diff freely once you've dismantled the bull pinion housings. The diff is not disturbed in the operation. I'll post a few photos when I have found them - probably tomorrow. It's a pretty straightforward job. The photos will explain a lot.
Best
Adrian
Re: Photos of what ive been up too :)
Posted: Thu May 09, 2013 9:21 pm
by thestig246
Thats sounds good to me thankyou
I managed to drop the extendend pto shaft out tonight was surprised how easy that came out
. And also dropped the pto box off the bottom of the gearbox bit. And found the one seal at the bottom thats to be changed
Im at abit of a head scratching point where to go next as to dismantleing the rest, do you just pull the gearbox offer the back axel part and then would it just pull apart
Thanks again! dan
Re: Photos of what ive been up too :)
Posted: Thu May 09, 2013 9:21 pm
by AdrianNPMajor
Re: Photos of what ive been up too :)
Posted: Thu May 09, 2013 9:36 pm
by AdrianNPMajor
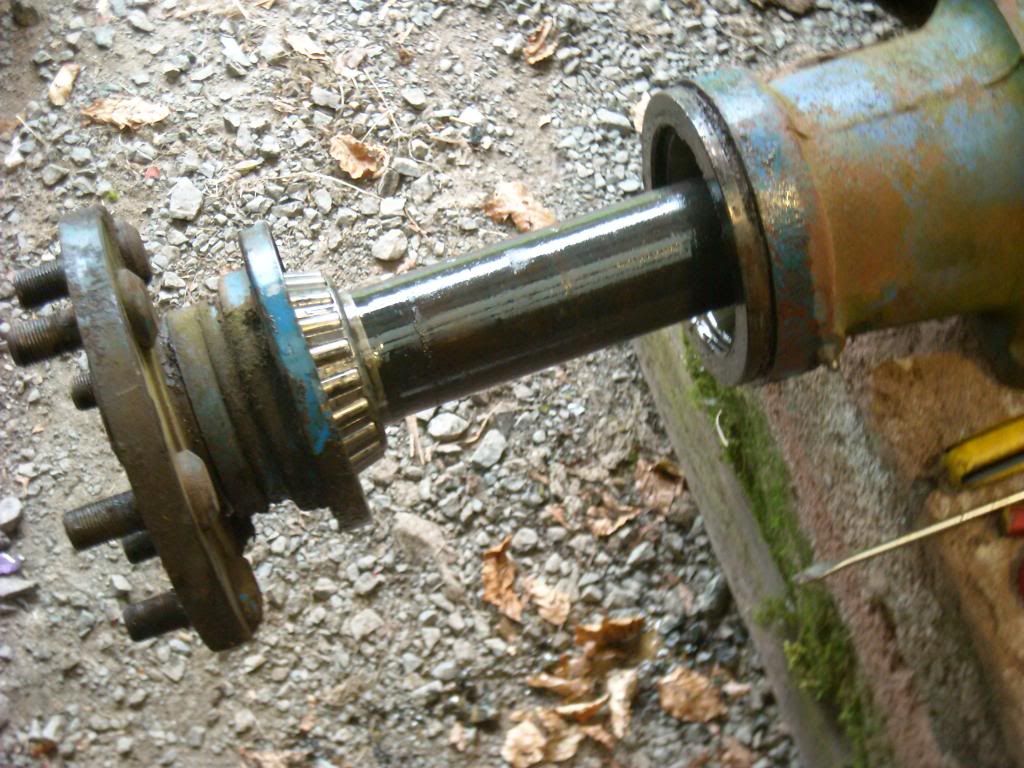
Tractor split between gearbox and rear transmission. Once you've got this far, extracting the gearbox output shaft seal is easy.
[URL=http://s1216.photobucket.com/user/ ... .jpg[/img][/url]
[URL=http://s1216.photobucket.com/user/ ... .jpg[/img][/url]
Re: Photos of what ive been up too :)
Posted: Mon May 27, 2013 10:53 am
by thestig246
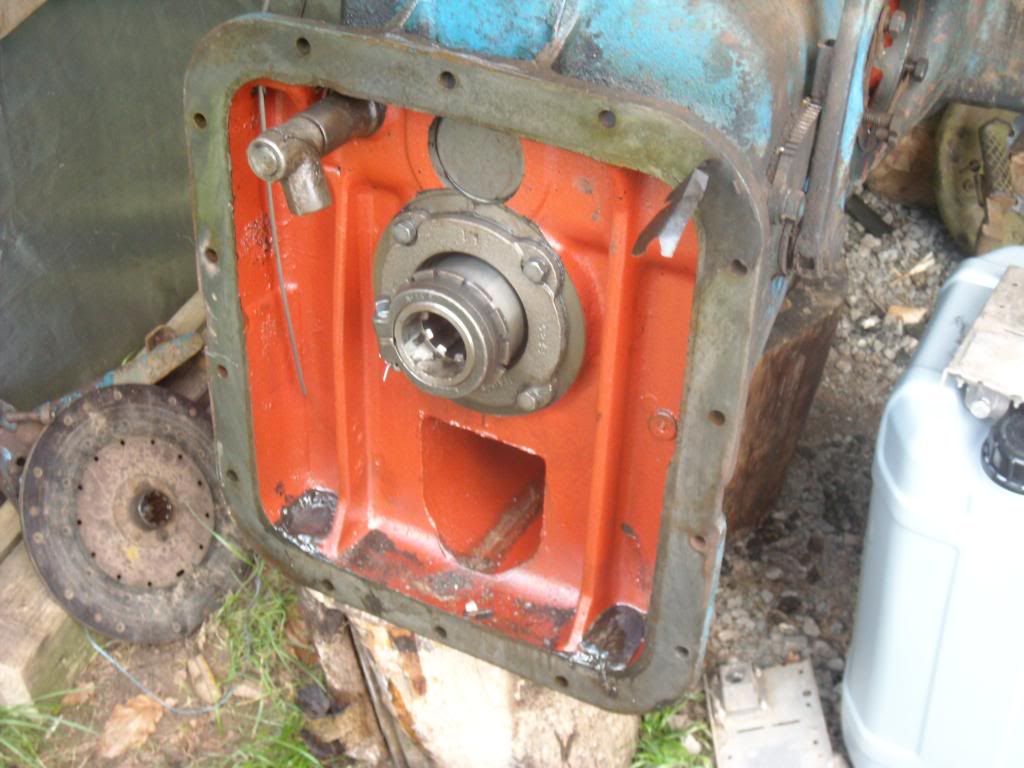
thanks again, with abit of a late night i managed to split the gearbox from the backend. SO im guessing the seal (or seals??) are behind this plate with four bolts?? how would i go about dismantling this part
? here are some photos at where im at
all the best dan
Re: Photos of what ive been up too :)
Posted: Mon May 27, 2013 11:56 am
by AdrianNPMajor
Hi Dan
Upper gearbox seal first. Remove the split pin from the bolt with the square head, loosen the bolt and remove the collar. [This collar holds in place a sleeve that the seal runs on.] Next remove the four bolts that retain the flange, then remove the flange. On the inside of this flange you will find the seal. Replace and reassemble (you'll need to make a new paper gasket for the flange - seat with Wellseal).
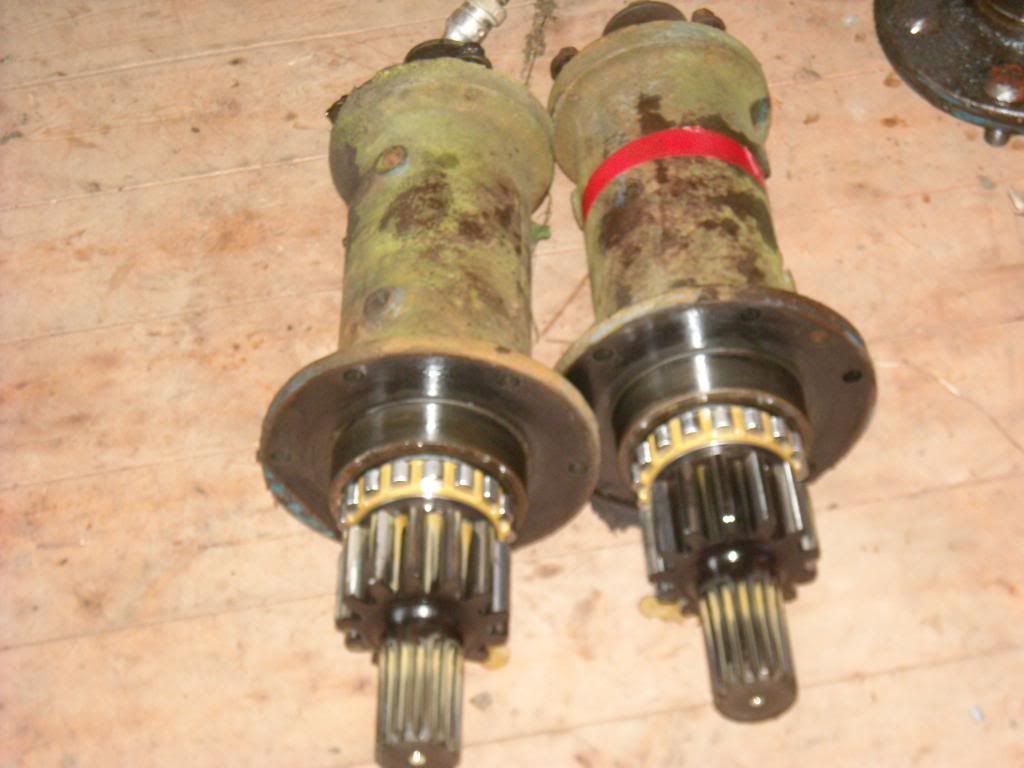
Re bull pinions, hold the assembly by the housing and bang the brake drum end of the shaft onto a block of wood repeatedly until the shaft pops out of its housing. Once the shaft is out, you will see the inner seal in the housing. Replace, relocate the shaft and knock it back into its housing using the same technique you used to extract it.
Best
Adrian
Re: Photos of what ive been up too :)
Posted: Mon May 27, 2013 5:22 pm
by thestig246
cheers adrain that came apart alot easyer than i was expecting
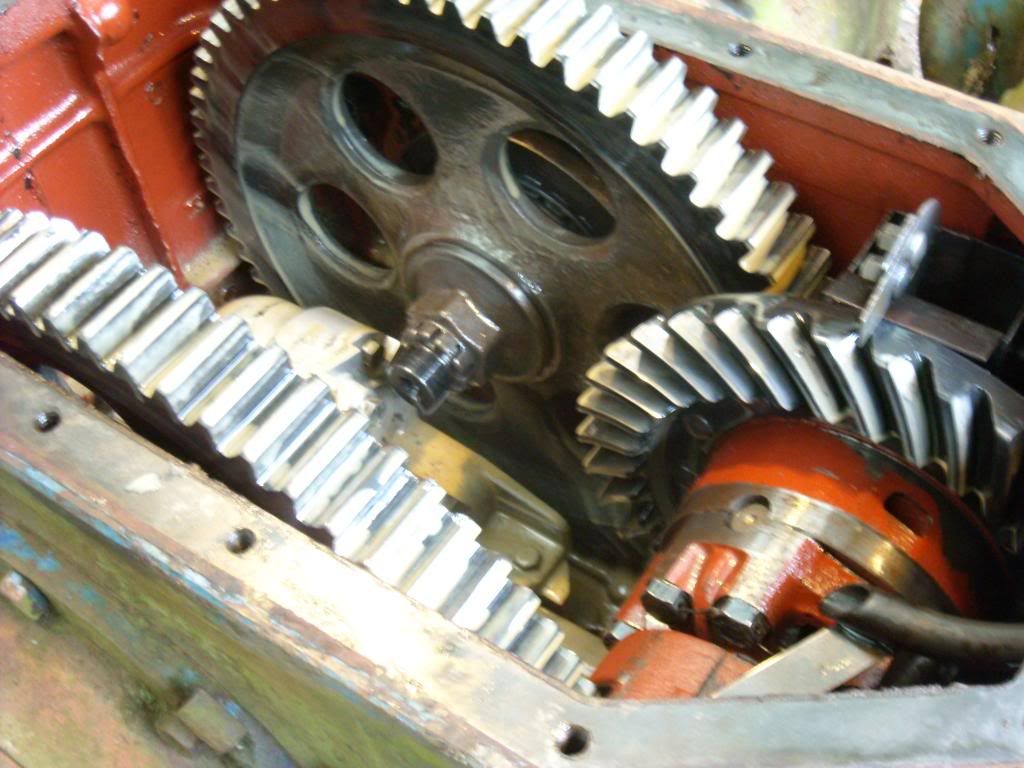
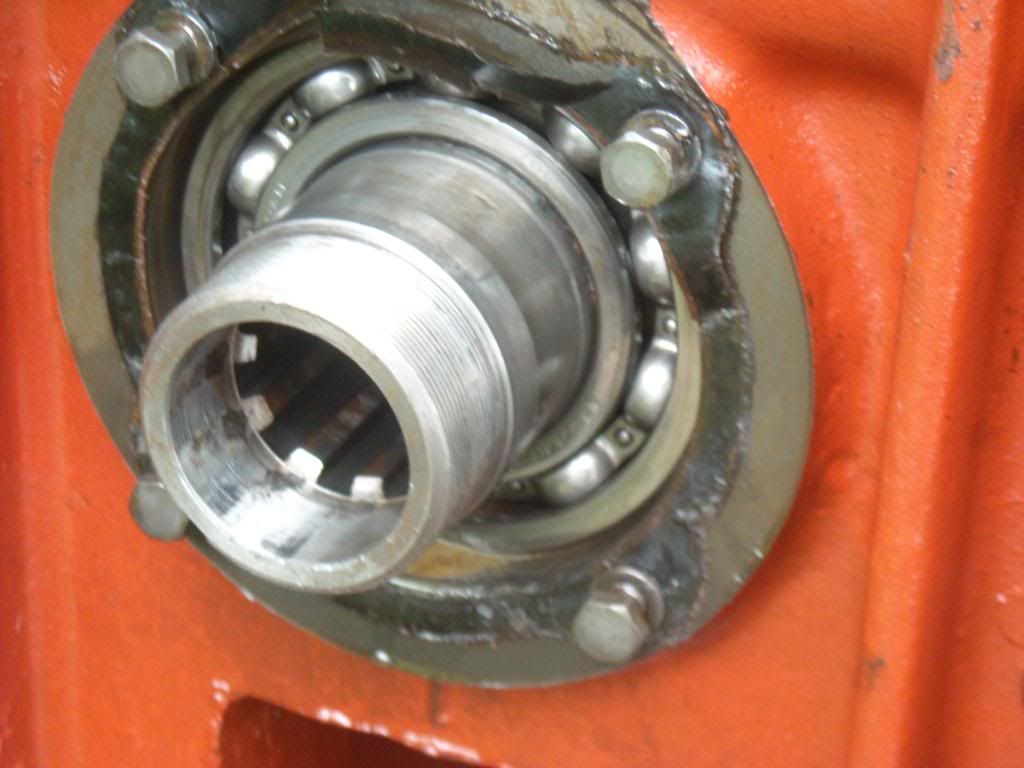
alltought i may have come across another problem the bearing in zed picture turns in the housing if i push it with a screwdriver
is this going tobe a problem, when the shaft it turned its runs as it should. but it abit worried about this as it pulls back and forth pretty easy...
i really didnt want tobe ventureing even further into the gearbox

many thanks dan
Re: Photos of what ive been up too :)
Posted: Mon May 27, 2013 7:44 pm
by AdrianNPMajor
Hi Dan
This is a head-scratcher

. The bearing like any other should be a nice tight interference fit in the housing. I wonder if it has ever been replaced? The remnants of the paper gasket on the seal flange look original so I would guess the bearing is original. Is it a Hoffmann bearing and is it marked 170 V3? Is there any play in the bearing itself, or between the outer race and the housing?
Best
Adrian
Re: Photos of what ive been up too :)
Posted: Mon May 27, 2013 8:53 pm
by thestig246
yes mate its the original bearing, interestingly i also noticed a date marked on the gearbox shaft, pressumibley when it came out of the factory
Yeah the bearing is spinning on the housing if i were to push it around with a screwdriver and pulls back and forth easyly
dan.
Re: Photos of what ive been up too :)
Posted: Mon May 27, 2013 10:25 pm
by AdrianNPMajor
If it's the original bearing, and it's not tight in its housing, then I'm still scratching my head and I'm not sure what to suggest. I'm wondering if it was like this when assembled at the factory.
To replace the bearing, you'd need to strip the gearbox. I personally wouldn't bother if the bearing has no play in it (it shouldn't have been starved of oil even if the seals had failed and let the oil flow into the rear transmission - the level in the gearbox remains high enough to lubricate this bearing). In any case, if the housing is slightly oversized, the next bearing won't be a tight fit either.
Wonder what others think.
Best
Adrian
[URL=http://s1216.photobucket.com/user/ ... .jpg[/img][/url]
Re: Photos of what ive been up too :)
Posted: Tue May 28, 2013 8:27 am
by thestig246
Yeah that was also my thought, i was thinking wheather i would get away with using some stud lock or bearing lock type stuff and glue the bugger in place
I know its not ideal but would it work?
Many thanks dan.
Re: Photos of what ive been up too :)
Posted: Tue May 28, 2013 8:55 am
by AdrianNPMajor
Hi Dan
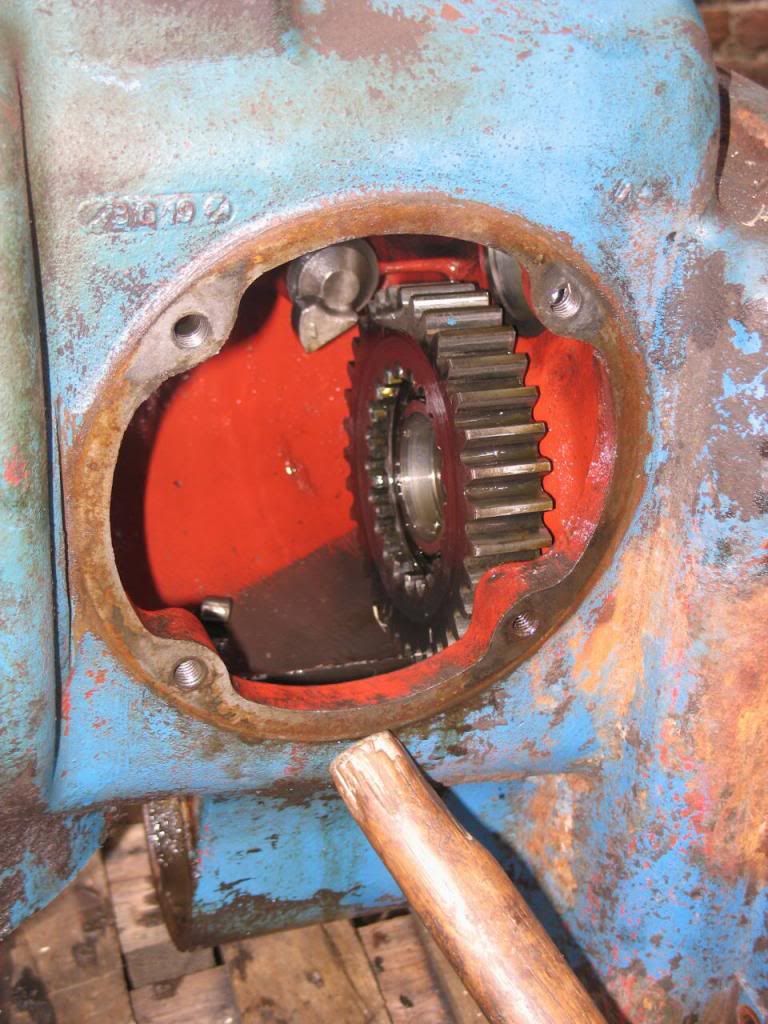
The photo below shows you what's going on inside the box. The fact is, the output shaft can't move backwards and forwards when the gearbox is assembled, so the bearing is under no pressure to do so either. The next question is: is it loose enough to rotate in its housing? Almost certainly not.
If there's no play in the bearing, I'd leave it, as personally I can't see a solution to the problem, which in any case is not a problem in practice if you are not experiencing any symptoms. Hope that makes sense!
Couldn't do any harm trying to loctite the outer race, though I'm not sure how you'd go about it.
Best
Adrian
[url
][/url]
Re: Photos of what ive been up too :)
Posted: Tue May 28, 2013 3:26 pm
by Pavel
The outer casings of bearings are not meant to be able to rotate in their housings -- rotation is the job of the balls or rollers. The hard shell of the casing will also cause increasing wear of the softer metal housing if allowed to.
As suggested, use Loctite -- I suggest their 660; designed for the job. It comes in a squeezy tube, can fill gaps of up to half a mm and can withstand temps. of 150C. It hardens within 24hrs.
The only problem is that the surfaces have to be perfectly cleaned of oil. I've used lots of inserted metho. and then blow dried with air afterwards.
Pavel
Re: Photos of what ive been up too :)
Posted: Tue May 28, 2013 5:37 pm
by AdrianNPMajor
Any idea why the outer race might be loose in its housing, Pavel? If the bearing had started to wear, due to oil starvation, this might have created play, which in turn might have caused the outer race to move and cause wear in the housing. But I think Dan said there is no play in the bearing, so that theory doesn't stand up and to be honest it doesn't sound very likely anyway.
If there is play between the outer race and the housing, Dan's got a problem, as all of the power goes through this point. Having a bearing chattering away in its housing will quickly lead to destruction of the bearing. But that would have happened already, and if it hasn't, it seems to point to a marginal looseness of the outer race in its housing, enough to allow it to slide inside the housing but no more. And I think that Dan said that rotation of the shaft does not cause the outer race to rotate.
How do you think this situation arose in the first place? Inaccurate machining of the bearing housing, but not so inaccurate so as to cause a problem?
Best
Adrian
Re: Photos of what ive been up too :)
Posted: Wed May 29, 2013 4:12 pm
by Pavel
I guess it's all conjecture, Adrian, as far as this situation is concerned, but from my relatively short spell in a machine shop [Wellworthys in Ringwood, Hants] I know that some machining can be a few microns out -- enough to allow fretting, and eventually wear. The sort of stuff that warranty claims are made out for. But I still hold that Loctite may well rectify the situation.
Pavel
Re: Photos of what ive been up too :)
Posted: Wed May 29, 2013 7:47 pm
by thestig246
Hi all thanks for the help, im pretty sure the locite should do the job as there isnt any wear to the housing as such, just ever so slightly loose. Heres a video of thats happening
http://www.youtube.com/watch?v=f_a0H0-yH2k
many thanks/


![[URL=http://s1216.photobucket.com/user/ ... .jpg[/img]](%5BURL=http%3A//s1216.photobucket.com/user/NPMajor/media/IMG_2408_zpse257c46a.jpg.html%5D%5Bimg%5Dhttp://i1216.photobucket.com/albums/dd363/NPMajor/IMG_2408_zpse257c46a.jpg%5B/img%5D)
![[URL=http://s1216.photobucket.com/user/ ... .jpg[/img]](%5BURL=http%3A//s1216.photobucket.com/user/NPMajor/media/IMG_2344_zps8316eca6.jpg.html%5D%5Bimg%5Dhttp://i1216.photobucket.com/albums/dd363/NPMajor/IMG_2344_zps8316eca6.jpg%5B/img%5D)
![[URL=http://s1216.photobucket.com/user/ ... .jpg[/img]](%5BURL=http%3A//s1216.photobucket.com/user/NPMajor/media/IMG_2409_zpsb1a8d459.jpg.html%5D%5Bimg%5Dhttp://i1216.photobucket.com/albums/dd363/NPMajor/IMG_2409_zpsb1a8d459.jpg%5B/img%5D)
![[URL=http://s1216.photobucket.com/user/ ... .jpg[/img]](%5BURL=http%3A//s1216.photobucket.com/user/NPMajor/media/IMG_2404_zpsc428724b.jpg.html%5D%5Bimg%5Dhttp://i1216.photobucket.com/albums/dd363/NPMajor/IMG_2404_zpsc428724b.jpg%5B/img%5D)
![[URL=http://s1216.photobucket.com/user/ ... .jpg[/img]](%5BURL=http%3A//s1216.photobucket.com/user/NPMajor/media/IMG_4958.jpg.html%5D%5Bimg%5Dhttp://i1216.photobucket.com/albums/dd363/NPMajor/IMG_4958.jpg%5B/img%5D)
![[URL=http://s1216.photobucket.com/user/ ... .jpg[/img]](%5BURL=http%3A//s1216.photobucket.com/user/NPMajor/media/IMG_4957.jpg.html%5D%5Bimg%5Dhttp://i1216.photobucket.com/albums/dd363/NPMajor/IMG_4957.jpg%5B/img%5D)
![[URL=http://s1216.photobucket.com/user/ ... .jpg[/img]](%5BURL=http%3A//s1216.photobucket.com/user/NPMajor/media/Outputbearinghousing_zpse3df85ff.jpg.html%5D%5Bimg%5Dhttp://i1216.photobucket.com/albums/dd363/NPMajor/Outputbearinghousing_zpse3df85ff.jpg%5B/img%5D)