Page 1 of 1
super major lift readjustment / repair
Posted: Mon Mar 26, 2018 7:01 pm
by mathias1
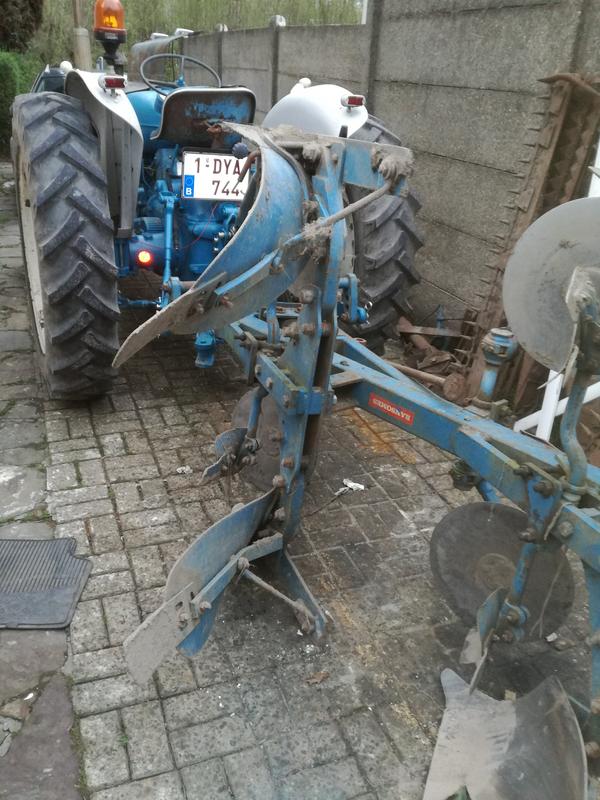
When I bought my tractor the lift wasn't working at all. This was caused by a disintegrated return filter and a sticky control valve. I removed the o-ring and installed a new filter. Since the lift was working, but the adjustments didn't seem always right. It happened a few times the lift wouldn't stay up to have just time enough to select the gear to move forward. There's also a lot of play on the bushes.
So an overhaul of the lift cover is needed. It's on the shedule for the coming days.
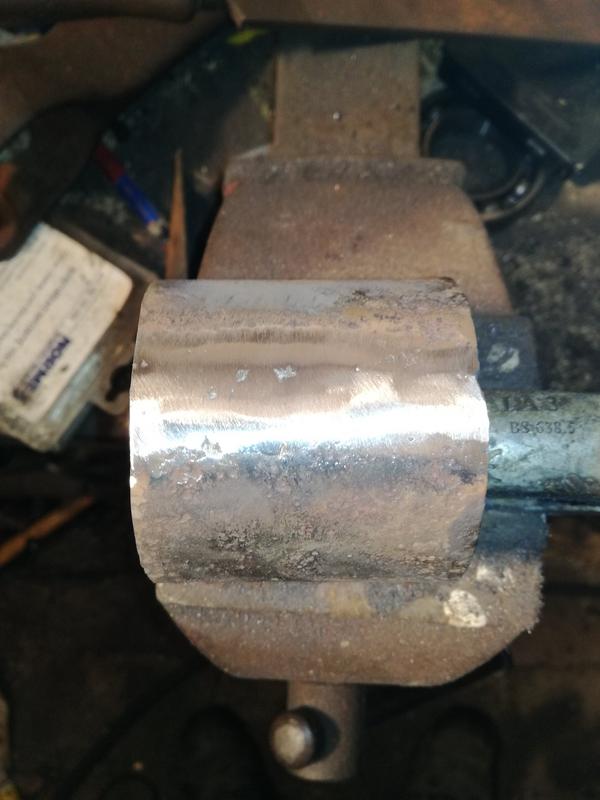
The new crossshaft and bushes already arrived:
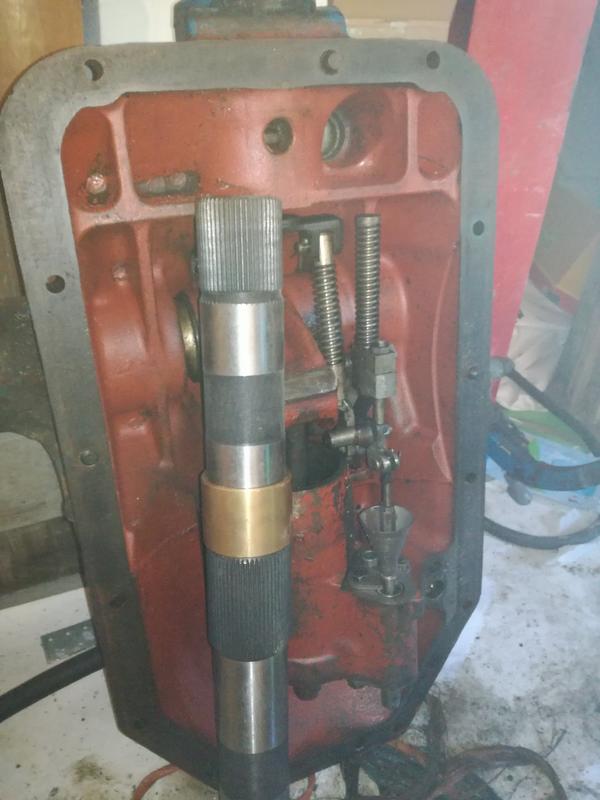
While I'm there, i will also install a new piston seal. This may help to prevent dropping.
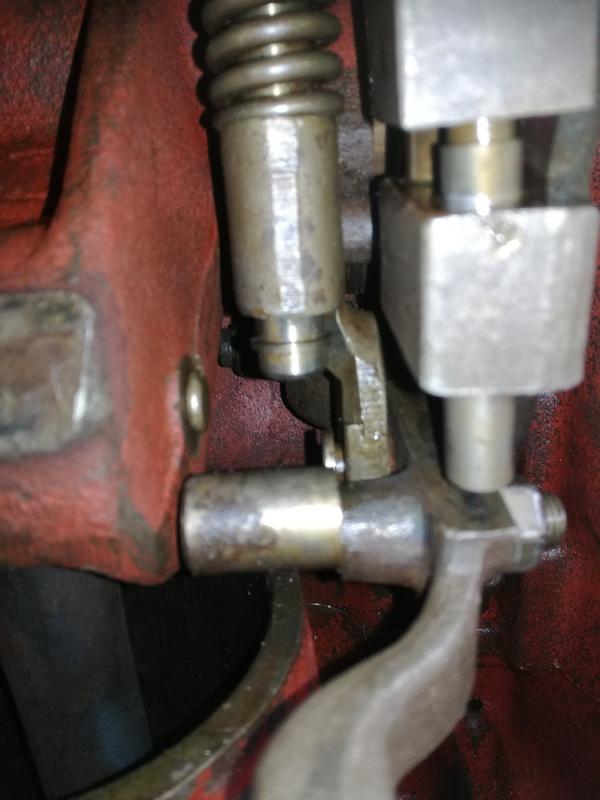
Set the main lift control lever to the upper raise stop in the quadrant then move it towards the lower position until the upper edge of the lever is 13mm (1/2”) from the top stop.
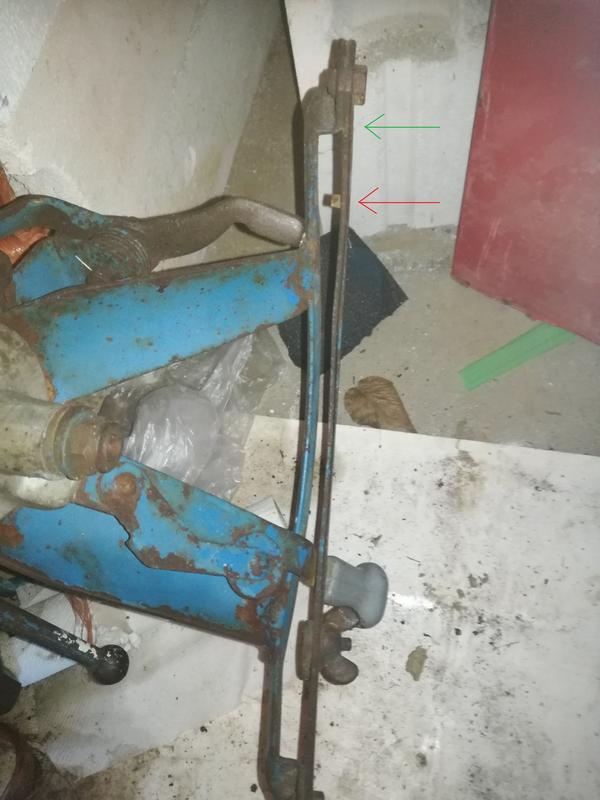
Is this the green or the red arrow, as I'm a little confused which one I should take
Re: super major lift readjustment / repair
Posted: Wed Mar 28, 2018 2:15 pm
by Brian
Hi Mathias, neither of the arrows are right, your confusion is because you have the lift on its back. The top stop is the little "bent in " tag which your sliding stop is up against at the "bottom" of the quadrant in your picture. (if that makes sense)
Re: super major lift readjustment / repair
Posted: Wed Mar 28, 2018 11:04 pm
by mathias1
Brian wrote:Hi Mathias, neither of the arrows are right, your confusion is because you have the lift on its back. The top stop is the little "bent in " tag which your sliding stop is up against at the "bottom" of the quadrant in your picture. (if that makes sense)
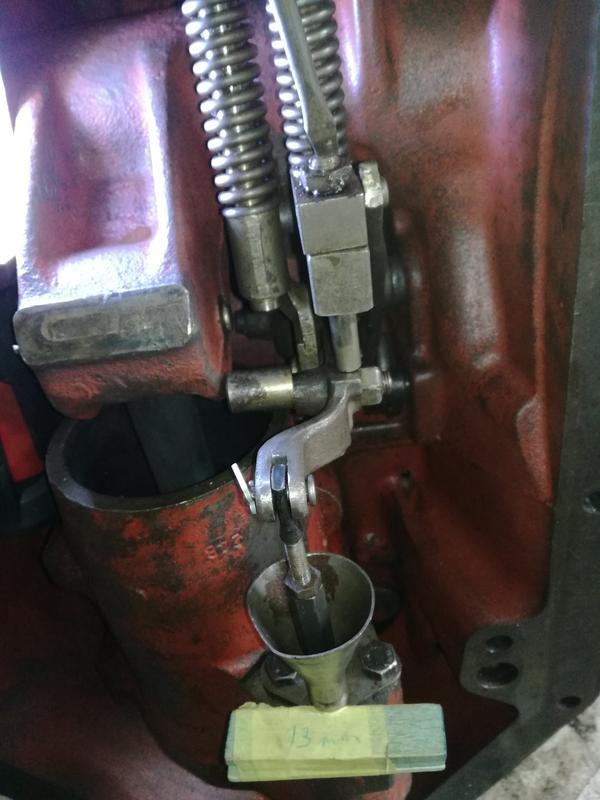
Thanks Brian, I think it's hard to see, but the red one is near the bent in stop. This is all for the quality control setting: The wiki says to raise the control lever to within ½” (13mm) of top quadrant stop. So this is untill hitting the "little bent" and then go back down ½”. The repair manuals (section of the new super major supplement) says to bring it above this little bent. a 0,010" feelerblade is then used between the plunger and the rear inner face of the casting

Is this just another way to Rome?
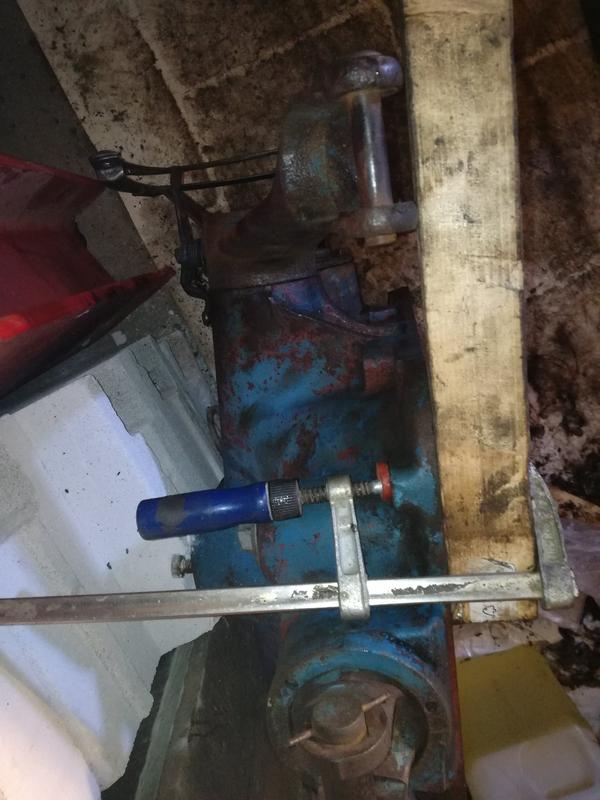
So far I've done:
turnbuckle will need some cleaning:
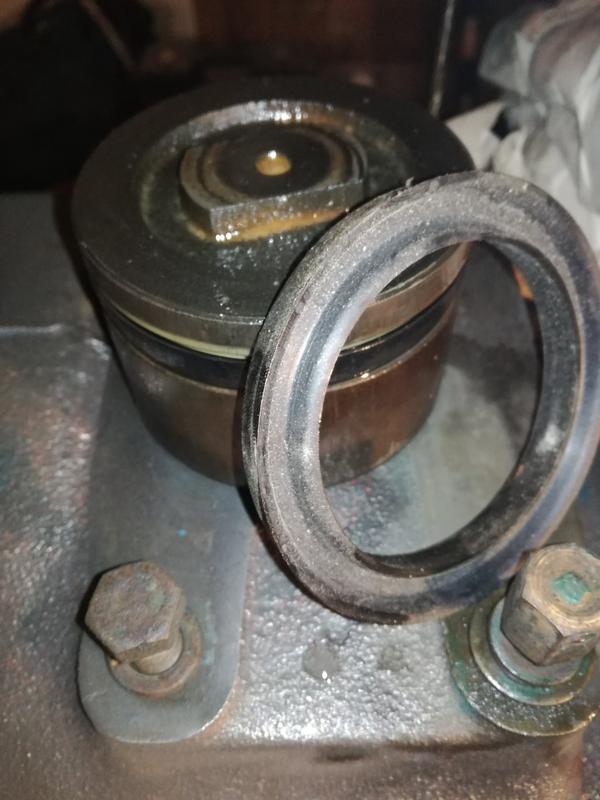
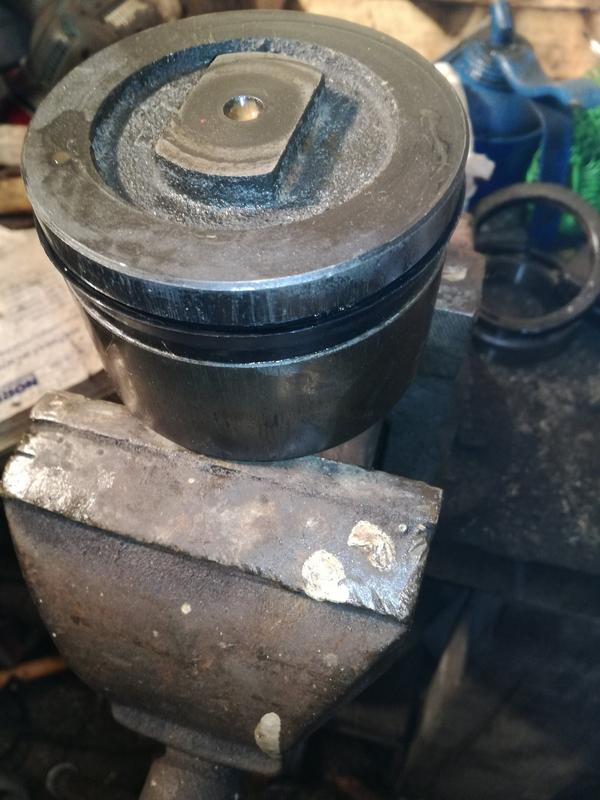
old piston seal off
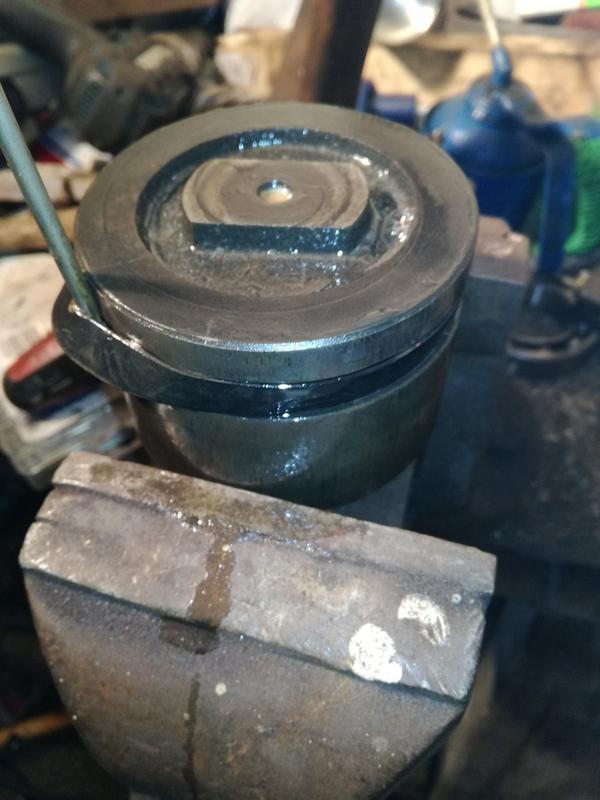
new piston seal mounted
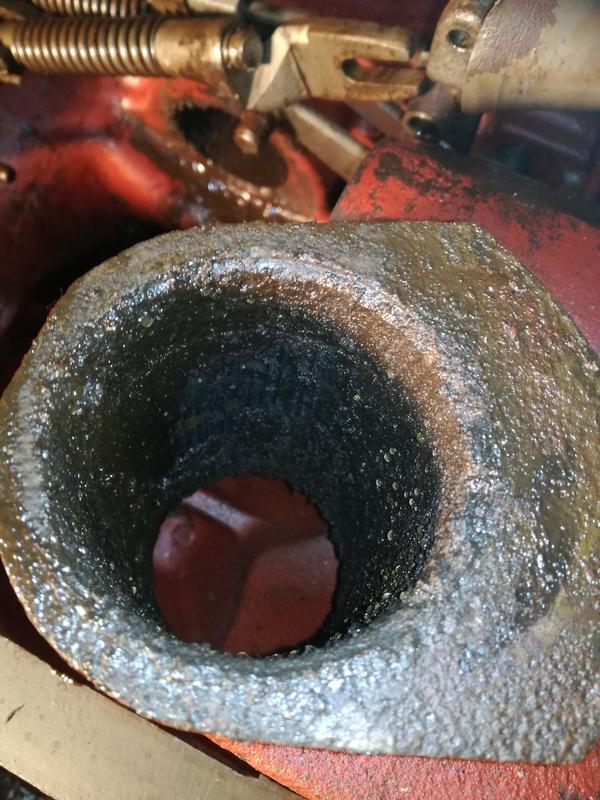
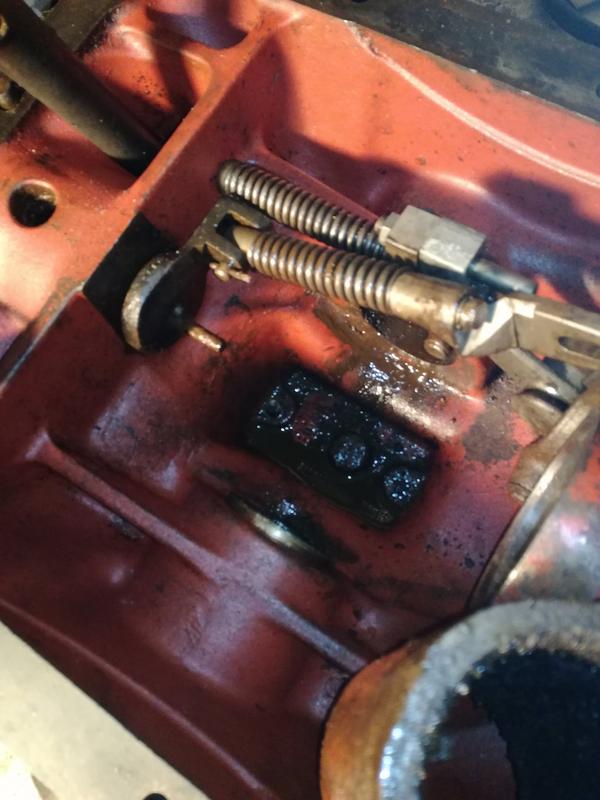
found lots of dirt inside the housing, I'm wondering if this might be 50 years old dirt

I needed to cut one of the spacers as it was rusted to the shaft.
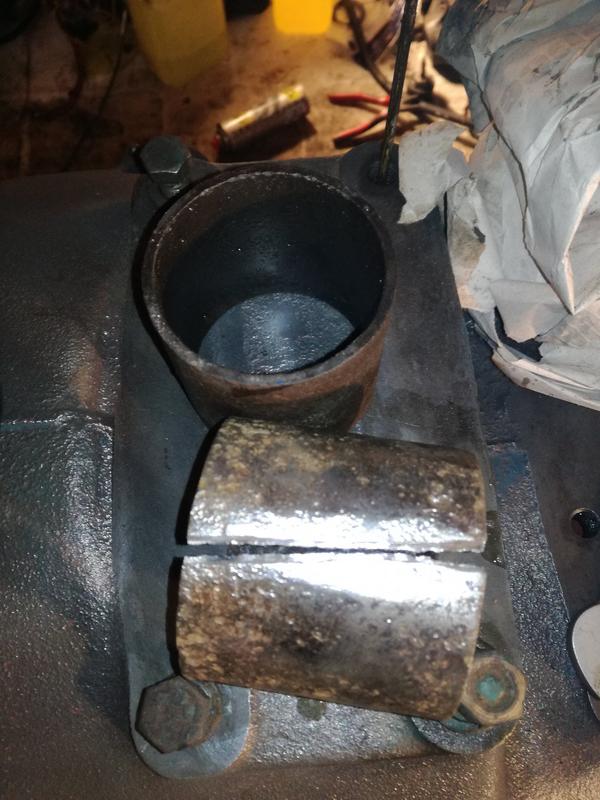
Tried to weld it as good as possible
Re: super major lift readjustment / repair
Posted: Thu Mar 29, 2018 8:46 am
by Brian
Sorry Mathias it is me that needs my glasses or possibly I have spent too much time in Australia.

Draft Control Adjustment.
Setting of lift arms as for single acting lift.
Select Draft control.
With main control lever at bottom of quadrant, place a 10mm gauge between the control valve and the face of the ram cylinder.
Bring control lever to within ½” (13mm) of top quadrant stop trapping the gauge firmly between the valve land and the ram cylinder. A strong spring pressure will be felt as this is done and the spring on the rod between the top link linkage and the control valve arm will be seen to compress as the connecting fork slides along the shaft. A measurement of 0.200” should be measured between the circlip and the actuating fork should be obtained. This can be adjusted by the turnbuckle at the control valve.
This is the way to do it according to the Ford manual, I was thinking you had a Super with a single acting lift.
Re: super major lift readjustment / repair
Posted: Sat Mar 31, 2018 10:32 pm
by mathias1
Thanks Brian,
I tried it out today:
first I did turn the spring link in untill I found minimal movement (like 1mm). I could also feel the tension. If I turned it more, I got more play.
Put draft control on
Arm in position:
2 blocks of wood (each 5mm) between control valve and face of ram cylinder:
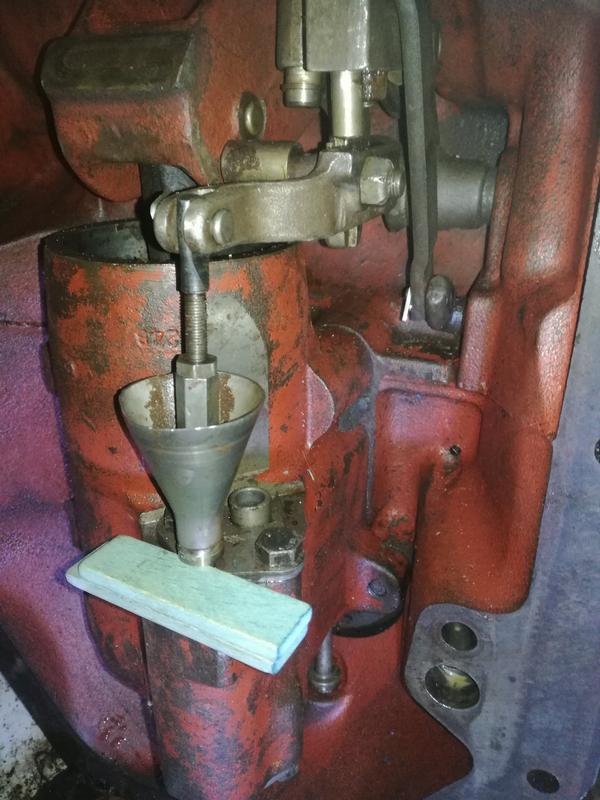
I put a drill of 13mm between control lever and little top stop

turned the turnbuckle until I got 0,2" where I needed
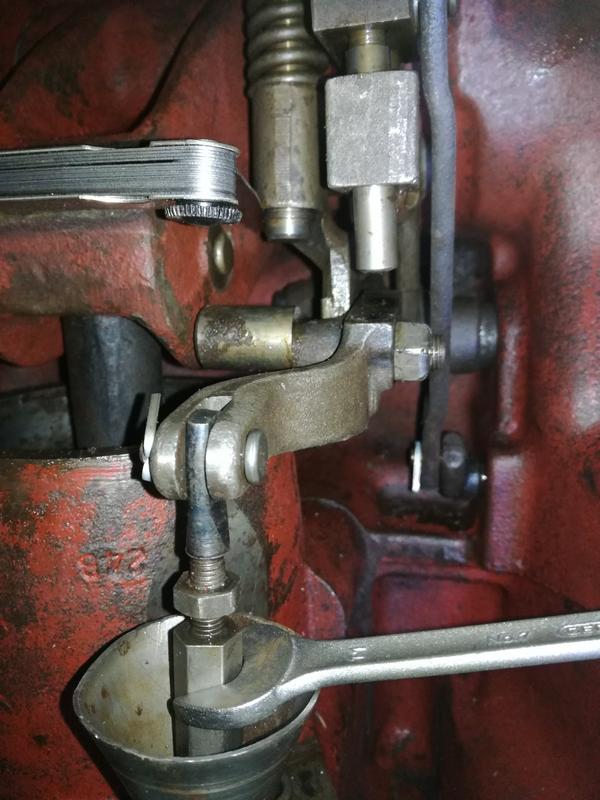
Edit: need to check the with on the last picture as I probably took 0,02" instead of 0,2. I just realise this should be around 5mm.
Will make some pictures while doing the position control also.
Re: super major lift readjustment / repair
Posted: Sun Apr 01, 2018 10:38 am
by Brian
Mathias, in the picture with the two blocks of wood at 5mm, if you look at the rod/spring that you are measuring, you will see it is just about the right distance between circlip and the front of the spring.
Re: super major lift readjustment / repair
Posted: Sun Apr 01, 2018 5:54 pm
by mathias1
I've corrected the adjustment until it's 0.2":
I did also the adjustment for the position control:
Lever fully down:
I did put 13mm between control valve and face of ram cilinder, adjusting the control rod:
Hopefully I now got more use of the quadrant in position control, as it lifted almost fully half way.
Re: super major lift readjustment / repair
Posted: Sun Apr 15, 2018 8:14 pm
by mathias1
Brian,
position control is now working as it should do.
Tried to do some ploughing today, but I've got into trouble with the lift not holding up.
I've got a leak in the auxilary control valve. Need to sort this out, may be change the block with another one?
Re: super major lift readjustment / repair
Posted: Tue May 22, 2018 9:07 pm
by mathias1
So far I did change the o-rings and gasket between the block and lift cover but no luck. The lift is even dropping with the ferilizer on even when the oil is not really hot. If I pull the aux knob out, it's still lowering, but less.
What I have done so far:
clean filter, new retour filter
fresh oil (30 SAE)
pump is working
new piston seal
removed oil seal on control valve
new relieve valve
What else is left:
full service on the aux block
new hydraulic cylinder block?
other ... ?
Re: super major lift readjustment / repair
Posted: Wed May 30, 2018 11:22 pm
by mathias1
I did pull out the "check valve" and it looks a little rusty
Will see if I also can remove the seat of the valve. I assume it maybe leaking here when the lift is up.