Page 1 of 3
my gearbox rebuild
Posted: Sun Feb 11, 2018 5:30 pm
by mathias1
Re: my gearbox rebuild
Posted: Sun Feb 11, 2018 10:59 pm
by mathias1
The clutch fork is now out. Same for the pulley.
Seems like I have to take some more parts of, as the gearbox isn't moving. Will post more pictures later.
Re: my gearbox rebuild
Posted: Mon Feb 12, 2018 10:55 pm
by AdrianNPMajor
Hello Mathias
Don't worry. Between us all you certainly have back-up.
To start at the beginning, why are you extracting the primary gearbox? When I got PJE 243 home, it was in quite a state, and I started by putting it up on axle stands, got the engine to start and ran the gearbox though all gears. There was a clattering sound in high box gears, so that told me I had to take the gearbox apart. If I hadn't heard this noise, I would not have dismantled the gearbox. So it would be good to know what indicators make you want to extract the primary gearbox.
Best, Adrian.
[url=https://postimg.org/image/h311busq ... .jpg[/img][/url]
Re: my gearbox rebuild
Posted: Tue Feb 13, 2018 7:22 pm
by mathias1
Re: my gearbox rebuild
Posted: Tue Feb 13, 2018 7:53 pm
by AdrianNPMajor
Exactly what I found. You're doing the right thing. Press on!
Best, Adrian.
Re: my gearbox rebuild
Posted: Tue Feb 13, 2018 8:06 pm
by AdrianNPMajor
Mathias, you are going to have to separate the gearbox from the rear transmission to replace that rear bearing. You can then also replace the upper seal. It's a pretty big job, but you are already halfway there.
Best, Adrian.
Re: my gearbox rebuild
Posted: Tue Feb 13, 2018 9:13 pm
by mathias1
AdrianNPMajor wrote:Mathias, you are going to have to separate the gearbox from the rear transmission to replace that rear bearing. You can then also replace the upper seal. It's a pretty big job, but you are already halfway there.
Best, Adrian.
Ok, thanks.
but I can do the front first? And then the rear part?
I'm currently having trouble to get the pto box out, shaft is alread out.
Re: my gearbox rebuild
Posted: Tue Feb 13, 2018 10:12 pm
by AdrianNPMajor
Hi Mathias
The gearbox is going to have to come out so that you can access both front and rear faces of the gearbox housing. The primary gearbox comes out through the front. Other elements of the gearbox require access to the rear face of the gearbox housing.
Probably best to get into the detail when the gearbox is removed. I have photos that show the detail.
Re the problem with removing the primary gearbox, the high-low gear selector has to be removed first. This is part of the dismantling process when removing the gearbox from the tractor, which is unavoidable.
Don't be overawed by the task. Once the gearbox is out, you can get at everything. Replace the failed bearings and the seals, and then you're on the way back.
Best, Adrian.
[url=https://postimg.org/image/ren1fbqe ... .jpg[/img][/url]
Re: my gearbox rebuild
Posted: Tue Feb 13, 2018 11:22 pm
by AdrianNPMajor
Re: my gearbox rebuild
Posted: Wed Feb 14, 2018 12:31 am
by oehrick
Thanks for starting to rebuild the Haynes manual Adrian,

I know I shall have to tread this path someday to replace the g/box output seal.
Having released both drop links I went over & reassembled today, having a buckrake is nearly as good as a dozer blade

, have been reversing amongst the remaining vertical Xmas trees shoving the rotten remains of the fallen into odd corners and picking up little piles of cordwood left last summer, even had enough daylight left to scrub & rinse the owl poop & pellets off the bonnet and tank, she looks a little more loved

Re: my gearbox rebuild
Posted: Wed Feb 14, 2018 6:37 pm
by mathias1
Adrian,
thanks for the information!
I have the primary gearbox out now.
Will start dismantling the gearbox tomorrow.
Re: my gearbox rebuild
Posted: Wed Feb 14, 2018 8:17 pm
by AdrianNPMajor
Loving the Haynes manual reference, Rick. Thing is, whenever I go anywhere where I haven't been before, including the inside of a Major gearbox(!), I tend to take my camera along!
Used to be a sketch on an old envelope, but this digital age has its advantages.
The buckrake sounds great. Love the way you use it for carrying firewood too. I'd like to get one.
Mathias, you don't give up, do you?!
Best, Adrian.
Re: my gearbox rebuild
Posted: Sun Feb 18, 2018 3:21 pm
by mathias1
I'm still in the process of dismantling.
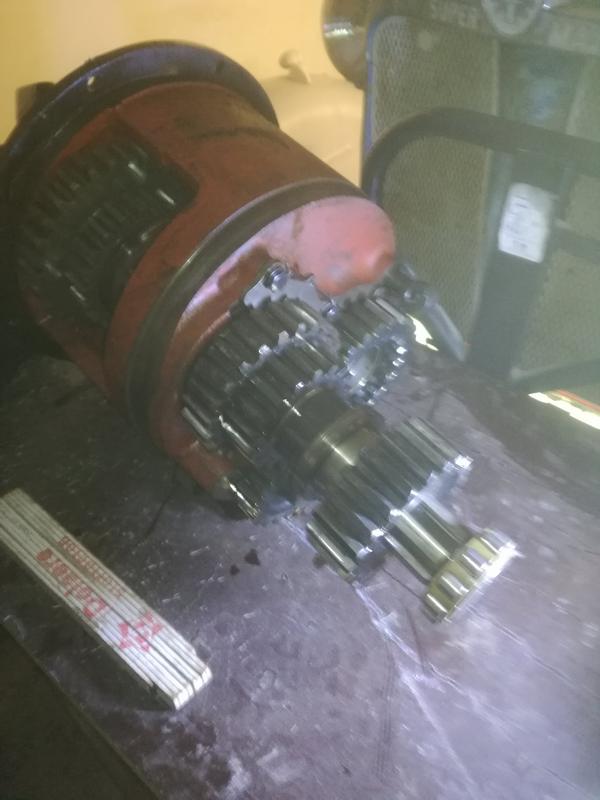
Seems like I need 2 bearings on the top and 1 on the bottom.
For the last bearing on the top: Can I reassemble the gearbox and attach the engine, before I split between gearbox and backaxle?
these are the bearings I need:
nj406
nj 305
nj 405
it's a little different from this tread:
http://www.fordsontractorpages.nl/phpbb ... hp?p=36843
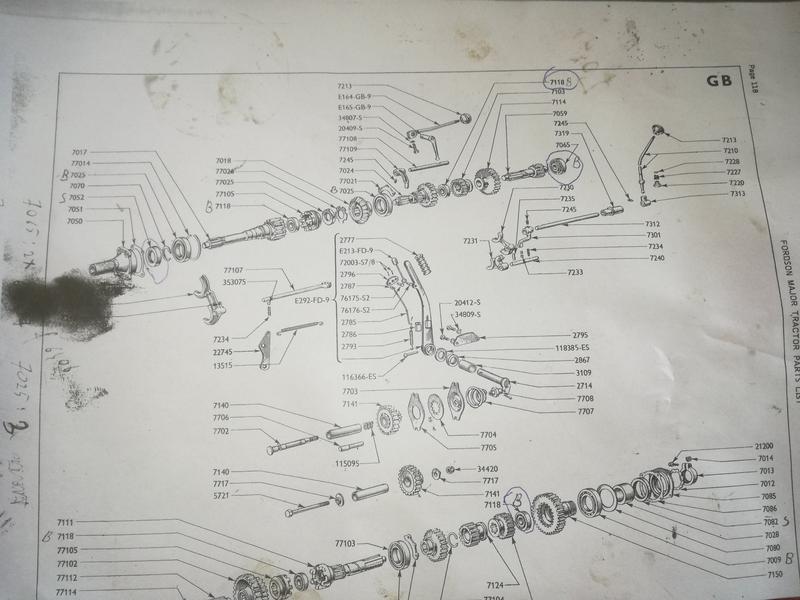
On the drawing is number 7065 used on the last one of the upper axle and on the first one on the lower axle. The upper one is a cylindrical, the lower one isn't

Re: my gearbox rebuild
Posted: Sun Feb 18, 2018 5:10 pm
by mathias1
Would it be interesting to find a transmission handbrake to install?
I also found that the seal on the input shaft is different then the one in the seals and bearinglist
1.7/8" inside x 3.1/8" outside x 3/8" wide.

Re: my gearbox rebuild
Posted: Sun Feb 18, 2018 9:56 pm
by AdrianNPMajor
Mathias, in answer to your question, no, this is not possible.
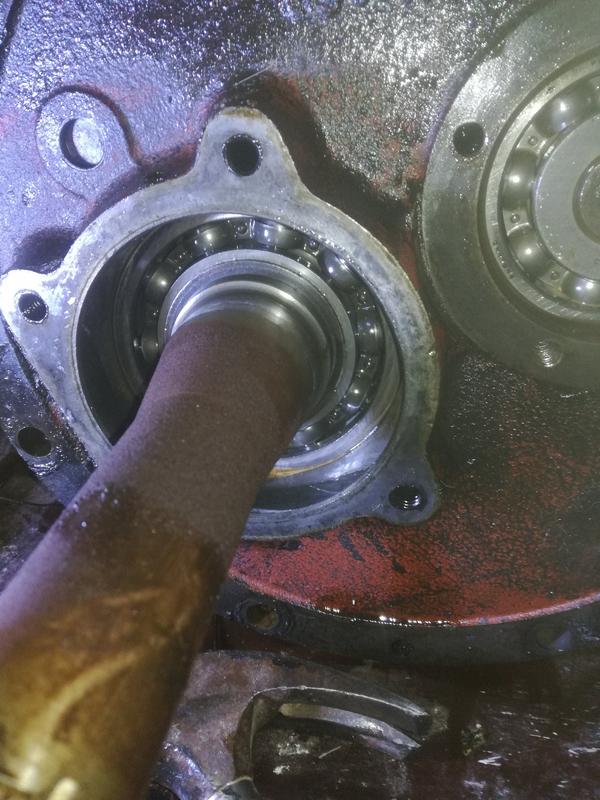
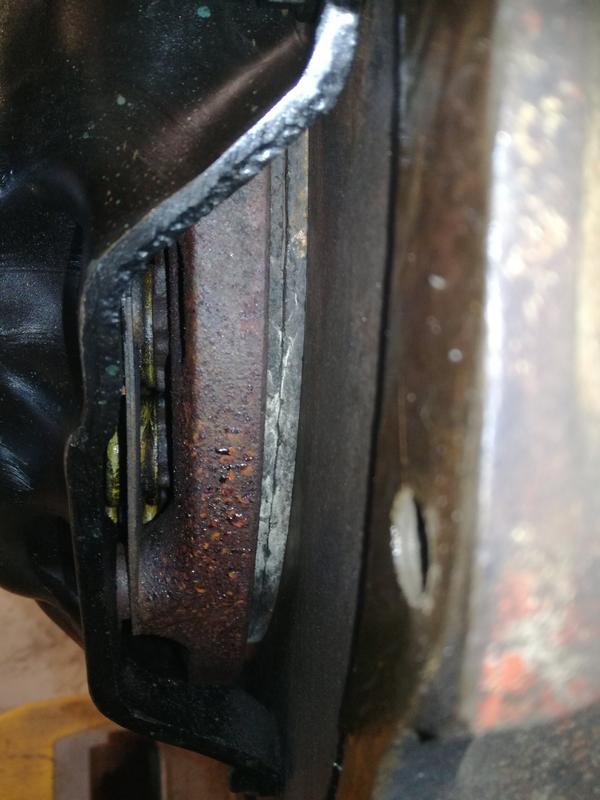
The bearing in question is a separable roller bearing, and the only practicable way to extract the outer race is to remove the core plug on the rear face of the gearbox housing (see photo below) and tap the old race out. The new outer race is installed from the inside - the race has a shoulder that buts up against the inside of the gearbox housing wall and holds the upper shaft in position longitudinally. It's at this point that you deal with the upper gearbox seal located on the output shaft (output shaft already removed in the photo below). It may be possible to extract the old race from the inside, but if the aim is to fix not just the failed bearings but the two seals as well, then separating the gearbox from the rear axle is only way forward.
I recommend replacing the lower gearbox seal (located in the PTO housing) when you have the gearbox free from the engine and rear axle. You can then flip the gearbox upside down, meaning that you are not fighting gravity when disassembling and reassembling. The PTO housing is no lightweight, and on reassembly it has to be eased rearwards as it is engaged into the opening on the underside of the gearbox housing. This is not easy if you are trying to do it whilst lying under the tractor.
Another reason for stripping the gearbox as shown below is that you can give the housing a thorough clean ready for the new oil that you will wish to refill the gearbox with.
Long story short - the gearbox needs to be separated from both engine and rear axle.
Good luck!
Best, Adrian.
[url=https://postimg.org/image/4qhs16gr ... .jpg[/img][/url]
Re: my gearbox rebuild
Posted: Mon Feb 19, 2018 10:52 pm
by mathias1
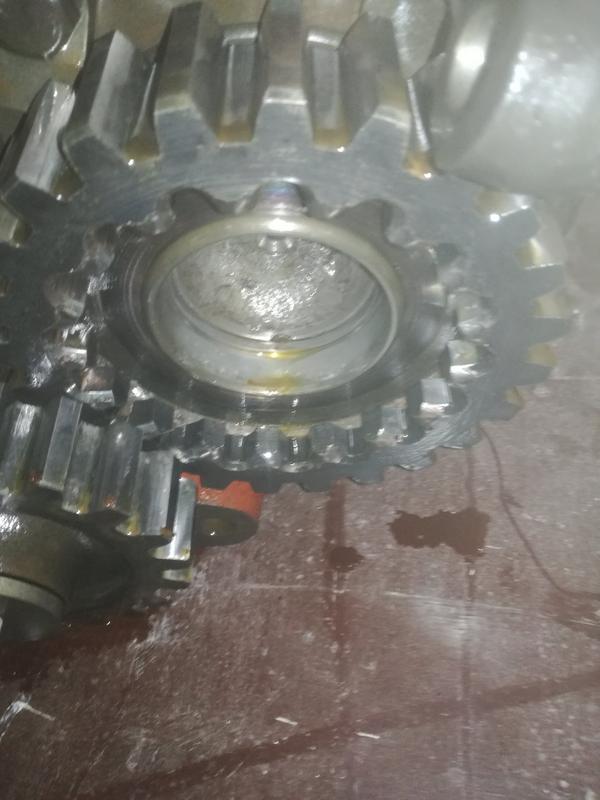
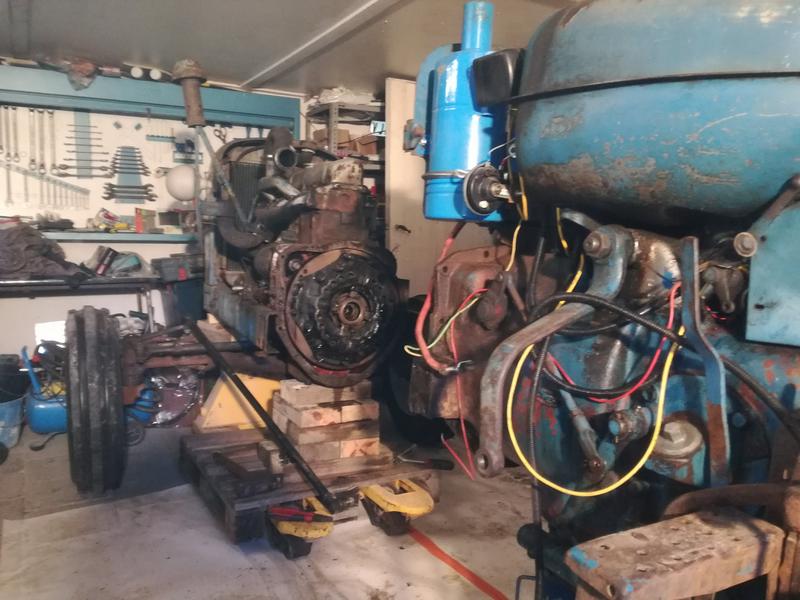
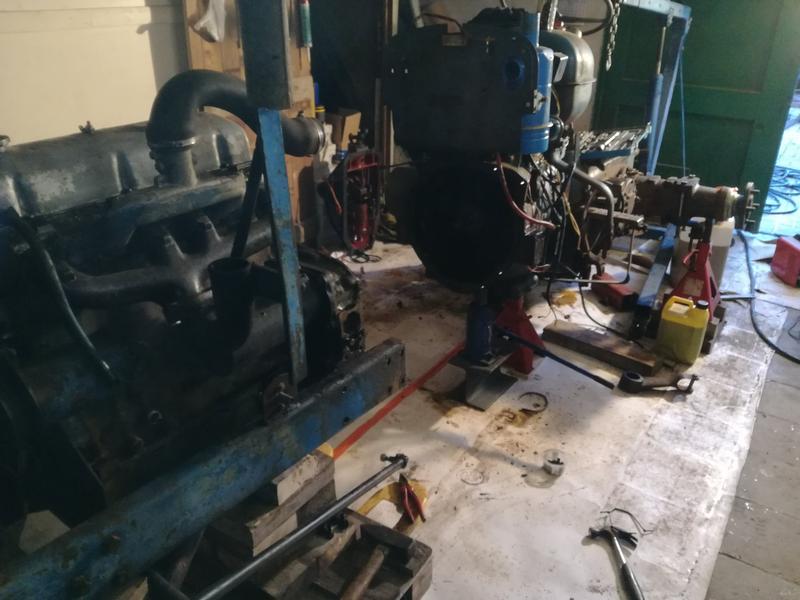
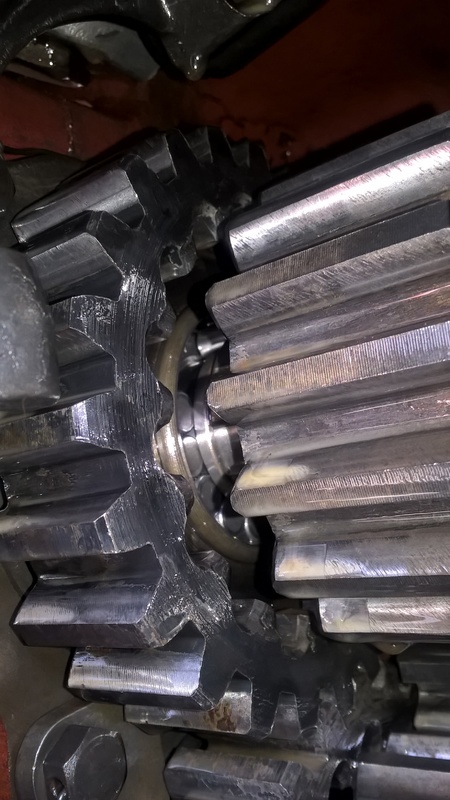
Well, I did some more work today.
Since I don't have much place, I did remount the gearbox to the engine and split the rear using the pallet jacket.
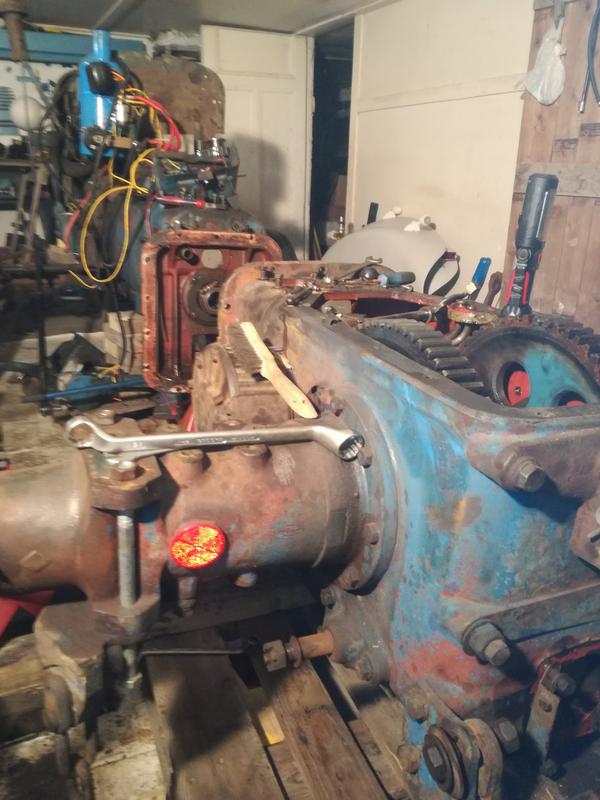
So I need to tap out the plug to the rear (hammer in the gearbox) or the other way around? I was thinking to use the welder to get the outer race out. Are there any seals?
I'm almost at the seal, although the housing isn't getting out well.
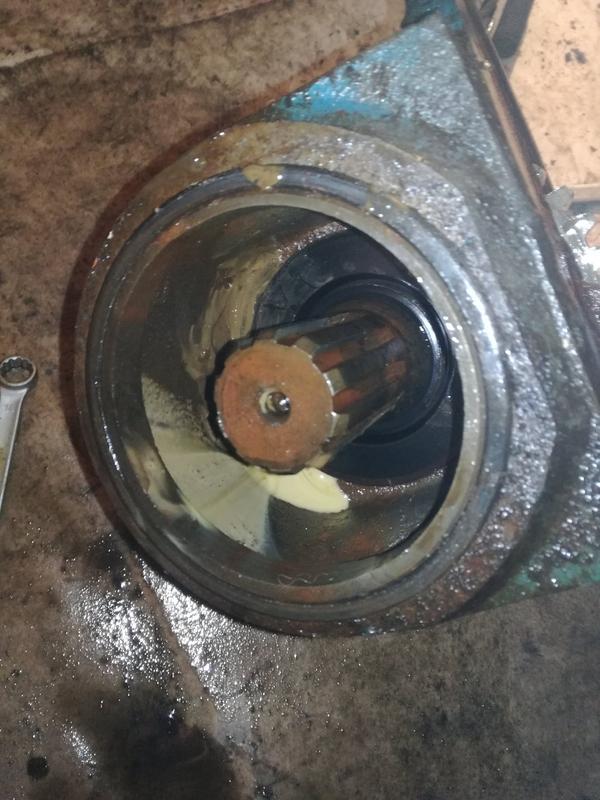
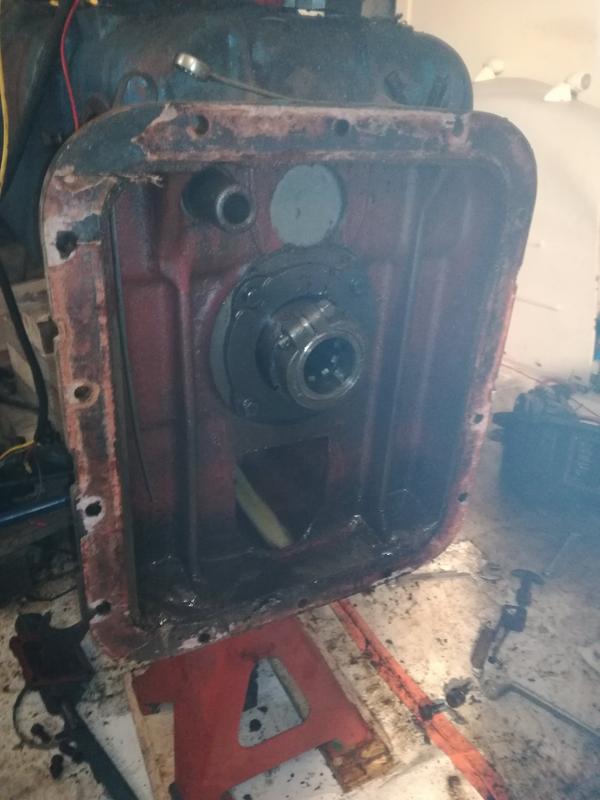
This should be the seal of the PTO box. Is it normal to sit that far? How to get it out?
thanks for all the help!
Re: my gearbox rebuild
Posted: Tue Feb 20, 2018 1:33 am
by AdrianNPMajor
Okay, you're getting there!
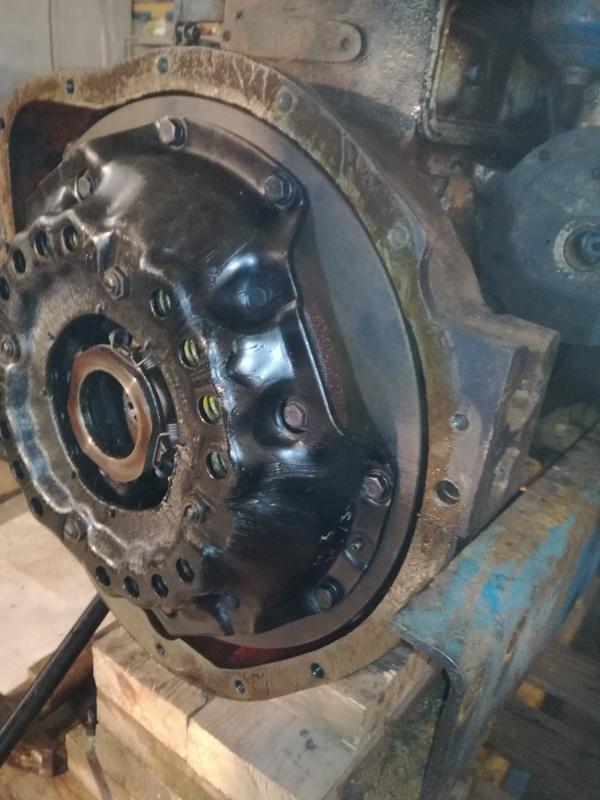
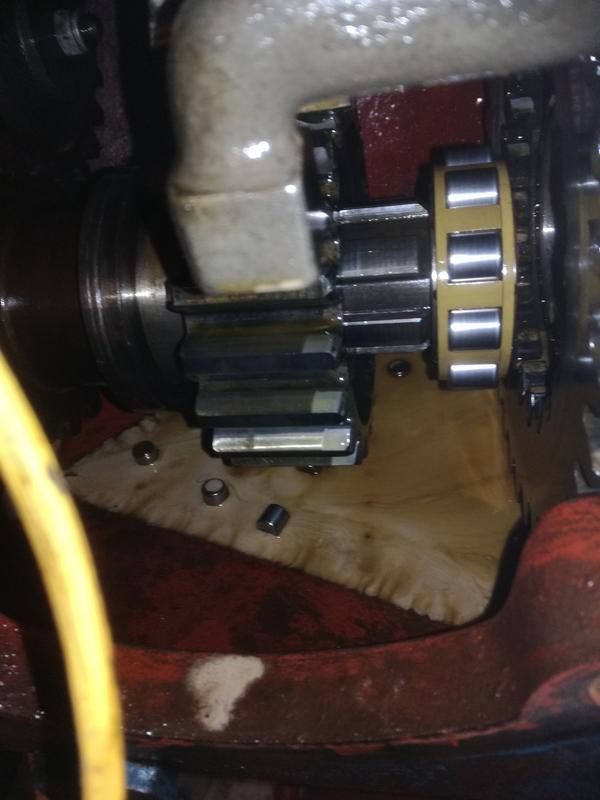
Taking your second photo first, find a large socket that fits just inside the circumference of the core plug and use a club hammer to hit the socket to knock both the core plug and the outer race out of the housing.
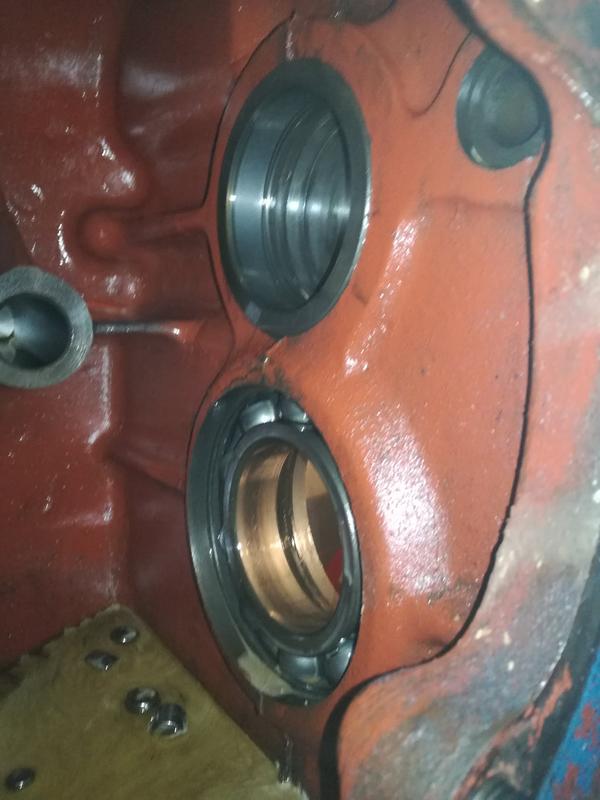
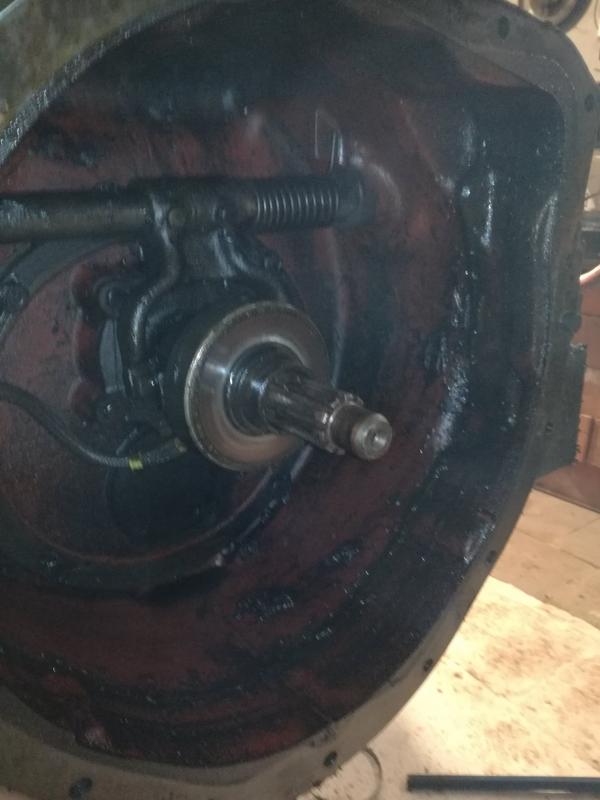
In photo three you have removed the final drive gear/shaft combination. Now check that there is no play between the final dive shaft bearing and the gearbox housing. I was lucky on PJE 243. It was a tight fit. I have read that some of these bearings wear and create vibration, which in turns chatters against the fit in the housing causing a loose fit. Hopefully that will not be the case here.
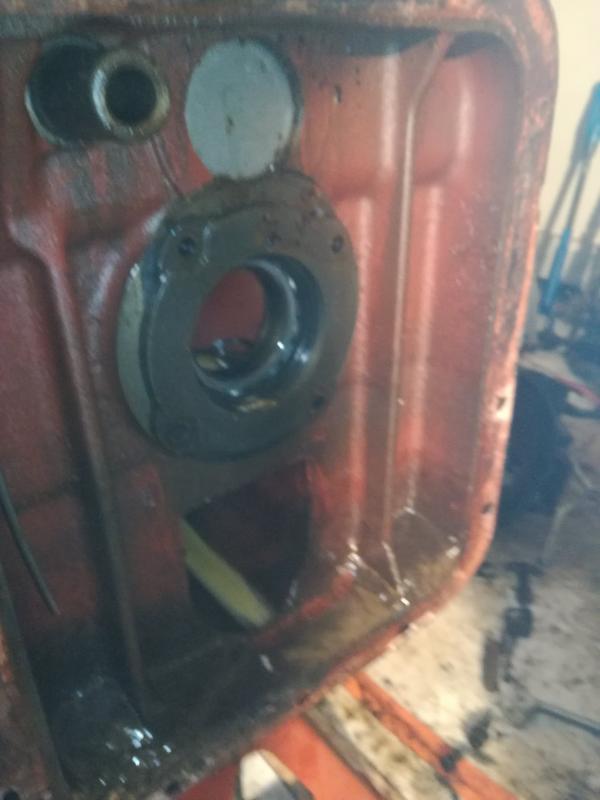
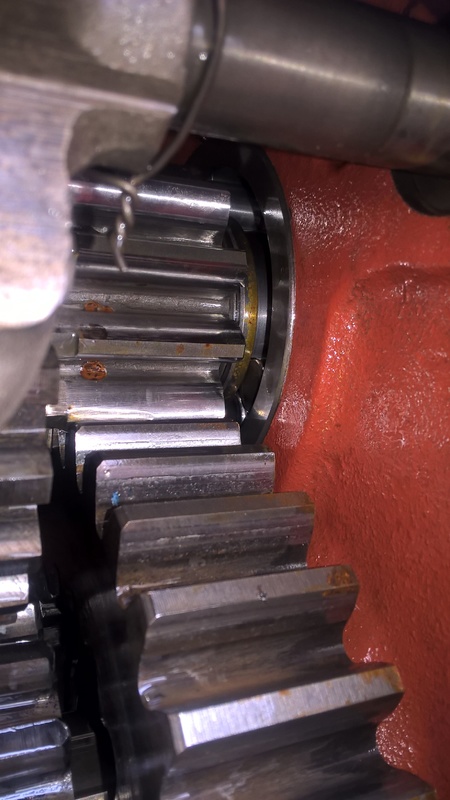
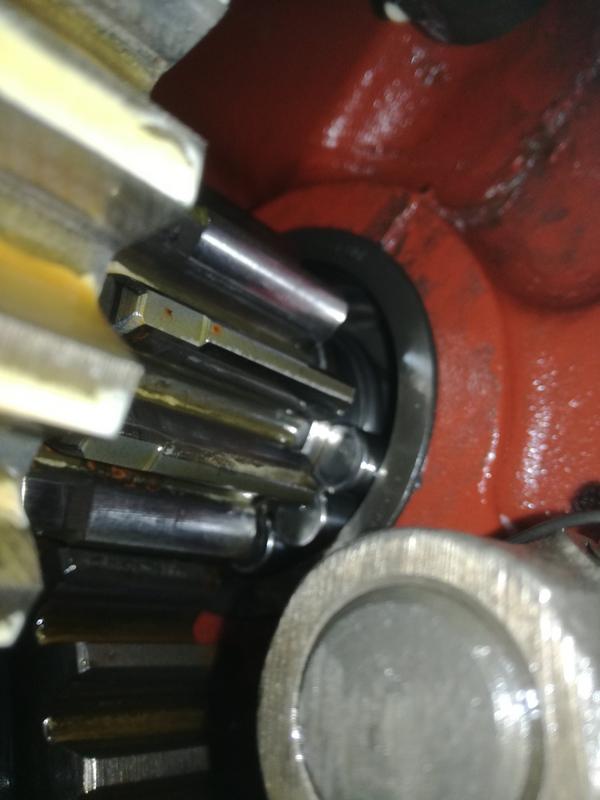
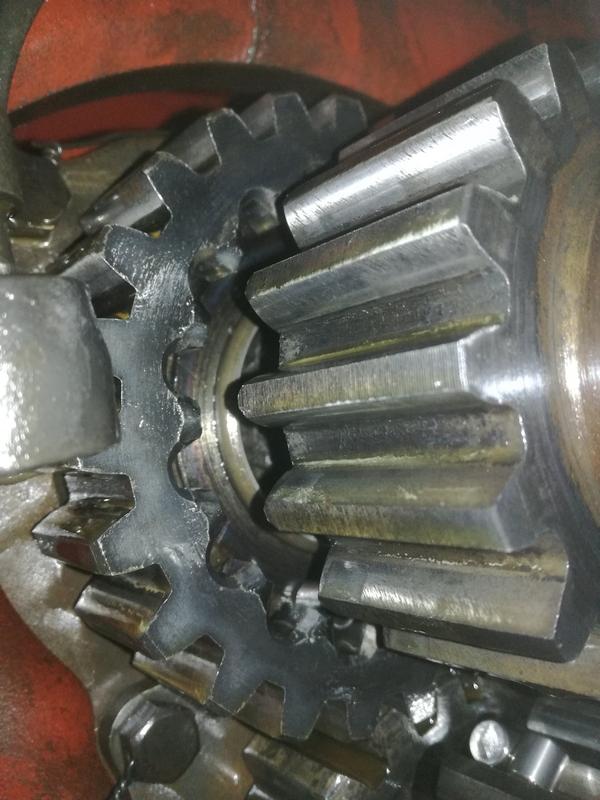
Re your last photo, you need to remove the end plate of the PTO housing and knock the shaft complete with its bearings (bearings are circlipped in place on shaft) backwards out of the housing, partially, as shown in the photos below. The narrower diameter splined section of the stub shaft will then be positioned inside the diameter of the old seal, giving you room to draw the old seal out. It's a double lip seal for holding oil back from both directions - the gearbox and rear axle. Insert new seal using a large socket on the end of a socket extension as your drift. Grease lips of seal before fitting so that when you knock the shaft/bearing assembly back into the housing, the seal slides into place on the shaft.
You have presumably taken the backing plate off the final drive shaft aperture to uncover the upper seal. Replacing this is self-explanatory.
You've almost reached the point where you need to put everything back together again!
Best, Adrian.
[url=https://postimg.org/image/9zv1ppb3 ... .jpg[/img][/url]
[url=https://postimg.org/image/xe311n0q ... .jpg[/img][/url]
[url=https://postimg.org/image/sffin44n ... .jpg[/img][/url]
Re: my gearbox rebuild
Posted: Tue Feb 20, 2018 1:53 am
by AdrianNPMajor
ps You've got the lid off the rear axle. Spray the inside of the rear axle with degreaser and pressure wash fifty years of filth out of the front of the housing.
Best, Adrian.
Re: my gearbox rebuild
Posted: Tue Feb 20, 2018 1:57 am
by AdrianNPMajor
pps Emulsion and rust showing in your photos. The old girl is going to sigh happily when you put her back together and introduce some fresh oil!
Re: my gearbox rebuild
Posted: Tue Feb 20, 2018 2:18 am
by AdrianNPMajor
Forgot to say that, when you replace the core plug, seal it with some blue hylomar or something similar. Seal the backing plate of the upper seal assembly with blue hylomar also.
Re: my gearbox rebuild
Posted: Tue Feb 20, 2018 10:05 pm
by mathias1
Adrian,
plug is out, together with the outer ring of the broken bearing.
The lowest bearing seems ok.
Still have some trouble to get the old seal out of the pto house. Will work on it this weekend. In meanwhile I will order the new seals and start cleaning the gearbox.
thanks!
Re: my gearbox rebuild
Posted: Sun Feb 25, 2018 12:44 am
by AdrianNPMajor
Mathias, time for you to educate me!
How did you fix the broken casting around the high pressure hydraulic pipe?
Best, Adrian.
Re: my gearbox rebuild
Posted: Sun Feb 25, 2018 12:42 pm
by mathias1
Adrian,
I used a 2K epoxy glue
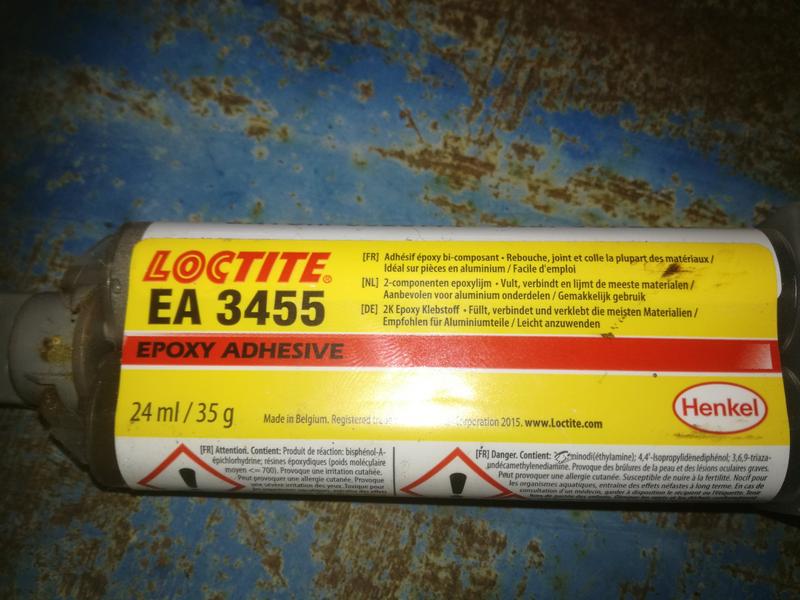
To reinforce I did place a grill mesh on the outside.
Re: my gearbox rebuild
Posted: Sun Feb 25, 2018 7:18 pm
by mathias1
So far I cleaned the back axle and refitted the outgoing shaft seal of the gearbox.
I also got the pto seal out, I needed a screw driver to destroy it before it went out.

How far does the nut needs to on the shaft. Now I can turn the shaft by hand, but it will stop rotating immediately.
Re: my gearbox rebuild
Posted: Mon Feb 26, 2018 1:19 pm
by AdrianNPMajor
Could you explain what you mean by the nut on the shaft? The only nut involved is the one that tightens the collar that holds the shaft sleeve in place. This nut should be tightened until sensibly tight and the split pin hole lines up with a slot in the castellated nut. Any drag you feel will be the new seal doing its job.
Re remounting the PTO housing, there is a large O ring that seals the joint between the PTO housing and the gearbox housing. I couldn't source a new O ring so I superglued the old one in place and bolstered it with a bead of silicon jointing. Worked well.
All looks good. You are now on the way back.
Best, Adrian.
![[url=https://postimg.org/image/h311busq ... .jpg[/img]](%5Burl=https%3A//postimg.org/image/h311busqj/%5D%5Bimg%5Dhttps://s25.postimg.org/b23ces64f/IMG_4597_1.jpg%5B/img%5D)
![[url=https://postimg.org/image/ren1fbqe ... .jpg[/img]](%5Burl=https%3A//postimg.org/image/ren1fbqez/%5D%5Bimg%5Dhttps://s25.postimg.org/qccuws7lr/IMG_4870_1.jpg%5B/img%5D)
![[url=https://postimages.org/][img]https ... .jpg[/img]](%5Burl=https%3A//postimages.org/%5D%5Bimg%5Dhttps://s25.postimg.org/x439zswn3/IMG_4877_1.jpg%5B/img%5D)
![[url=https://postimg.org/image/olttvgao ... .jpg[/img]](%5Burl=https%3A//postimg.org/image/olttvgaor/%5D%5Bimg%5Dhttps://s25.postimg.org/rsodf2v4v/IMG_4878.jpg%5B/img%5D)
![[url=https://postimg.org/image/4qhs16gr ... .jpg[/img]](%5Burl=https%3A//postimg.org/image/4qhs16grv/%5D%5Bimg%5Dhttps://s25.postimg.org/pamlznwj3/Output_bearing_housing.jpg%5B/img%5D)
![[url=https://postimg.org/image/9zv1ppb3 ... .jpg[/img]](%5Burl=https%3A//postimg.org/image/9zv1ppb3v/%5D%5Bimg%5Dhttps://s25.postimg.org/iuvw07zwf/IMG_4895.jpg%5B/img%5D)
![[url=https://postimg.org/image/xe311n0q ... .jpg[/img]](%5Burl=https%3A//postimg.org/image/xe311n0qz/%5D%5Bimg%5Dhttps://s25.postimg.org/jkeocl85r/IMG_4898.jpg%5B/img%5D)
![[url=https://postimg.org/image/sffin44n ... .jpg[/img]](%5Burl=https%3A//postimg.org/image/sffin44nv/%5D%5Bimg%5Dhttps://s25.postimg.org/mehtq1i1r/IMG_4899.jpg%5B/img%5D)